Fog Photography: Exposure and Composition Tips
 by Marco Carotenuto · · 10 min read
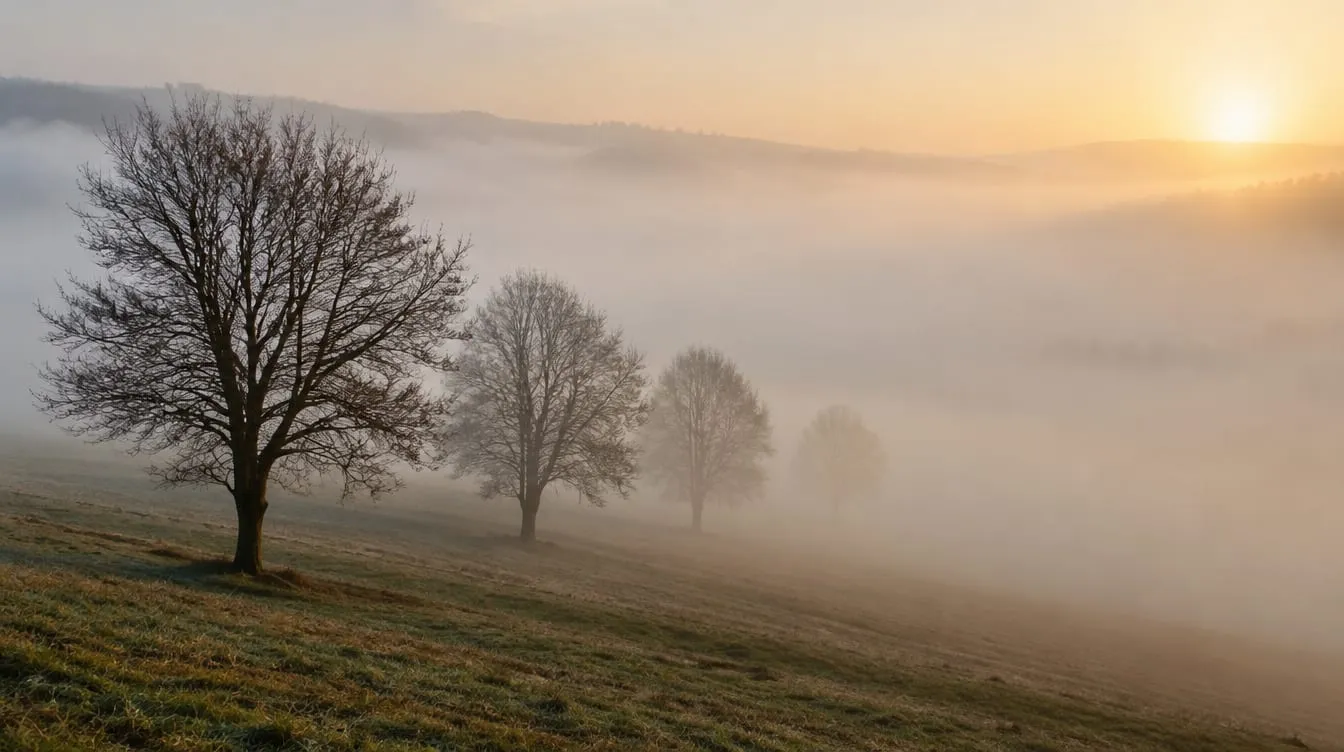
You get up before dawn, the valley is full of fog and the scene looks wonderful. At home, though, your photos are gray, flat, with nothing for the eye to land on. Fog photography is hard for two specific reasons: the camera misjudges the exposure, and the fog wipes out contrast and depth. You can fix both once you know what is going on.
This guide covers where and when to find fog, why your meter turns it gray, and why the sources disagree on how much exposure compensation to use. I will say so openly, and give you a test to settle it on your own camera. Then we get to focusing, building depth in layers, and a one-morning exercise.
When and where can you find fog to photograph?
On clear, still nights, in the hours before sunrise, near water and in valleys. According to the Midwestern Regional Climate Center, fog forms when the air near the ground cools to its dew point. Radiation fog appears at night under clear skies, because the ground gives back the heat it absorbed during the day, and it is most common early in the morning because the overnight low usually comes just before dawn. Cold air pools in low ground and valleys, where fog is denser.
Then there is the time window. After sunrise the air warms and the droplets evaporate. The National Weather Service notes that valley fog tends to dissipate very quickly once the sun comes up. Under overcast skies it can linger much longer (MRCC).
In practice that means arriving before the light, with the camera already set up, and expecting the scene to change within twenty minutes. For the rest of the planning (scouting, weather, a plan B) read how to plan a photo outing. And if you drive to your spot, take the MRCC’s advice: visibility in fog can change without warning, so slow down.
Why do foggy photos look gray and flat?
Two different causes, and they add up. The first is the meter: it measures reflected light and tries to render the scene as a middle gray, around 18%. When the frame is dominated by very light tones, such as snow or fog, the result gets pulled toward gray. Fstoppers lists bright fog among the scenes where you need to correct by hand.
The second is the fog itself. Reflex-Mania describes it as a giant light diffuser: it lifts the shadows, lowers contrast and saturation, and compresses the planes of the scene. These are the same symptoms you see in photos that look flat, with one difference: here low contrast is the raw material of the scene, not a flaw to remove. You manage it instead of fighting it.
Should you overexpose or underexpose fog?
It depends on the scene, and the sources contradict each other. This is what the ones I read in full say:
| Source | Advice | Stated reason |
|---|---|---|
| Fstoppers | +1 to +2 EV for snow, white sand or bright fog; more if the light surface fills most of the frame | The meter pulls the scene toward middle gray |
| Viewbug | +1 to +1.5 EV in aperture priority | Same cause: fog rendered gray and muddy |
| Kase Filters | −0.5 to −1 EV | Fog can trick the camera into overexposing and blowing out the whites |
| Reflex-Mania | Reduce by one or two stops | The meter would tend to overexpose |
| Sony (Italian page) | No value: check the histogram | At dawn the sun can make the fog brighter and you lose highlight detail |
The disagreement is real: the first two sources start from the meter turning fog gray, the others worry it will blow it out. None of them explains where the difference comes from. One plausible reading, and it is my hypothesis, is that it depends on what fills the frame and which metering mode you use. With fog covering almost the whole frame, the “middle gray” effect wins. With the sun or a bright sky in the scene, highlights are already near the limit and the risk is losing them.
So no single number always works. The histogram decides, and this is how you read it:
| What you see | What it means | What you do |
|---|---|---|
| Data bunched at the left or middle, fog looks gray | Underexposed | Add positive compensation in 1/3-stop steps |
| Data pushed against the right edge, clipping warning on the fog or the sun | Highlights lost | Reduce compensation |
| Data gathered on the right side without touching the edge | Right: low contrast is normal | Shoot RAW and add contrast when you edit |
Two practical details. In P, A and S modes compensation works on the meter; in full manual there is no compensation, you set the exposure yourself (Fstoppers). And the histogram on your screen is computed from the JPEG preview, not the RAW file: leave a small margin from the right edge.
What camera settings work for fog?
Start from a cautious base and adjust with the histogram.
- Shoot RAW. Fog lowers contrast and saturation: RAW gives you more room to correct them and to choose white balance when you edit (Kase, Reflex-Mania).
- Use a tripod. Light is limited and shutter speeds get longer. In Sony’s example captions the exposures are around 1/6 and 1/4 of a second, speeds that risk blur handheld.
- Keep ISO at its minimum. On a tripod with a still scene there is no need to raise it, and you avoid noise (Kase and Reflex-Mania both recommend it).
- Aperture between f/8 and f/11 as a starting point for depth of field. Sony suggests f/11, Viewbug f/8-f/11, Kase f/5.6-f/11: the spread depends on how sharp you want foreground and background.
- Aperture priority with compensation, or manual with histogram checks. See the section above.
- No flash. It lights the droplets in front of the lens and swamps the scene (see the FAQ).
How do you focus in fog?
Manually, or with one AF point on a nearby, high-contrast object. With little contrast, autofocus can hunt without locking on (Kase, Reflex-Mania). Viewbug notes that it works on near subjects with contrast and struggles on the white distance.
A simple method: magnify the live view on an element with crisp edges in the foreground (a trunk, a post, a rock), adjust until it is sharp, then leave the ring alone. The background is fog and has nothing to show: sharpness matters in the foreground and the middle ground.
How do you compose fog shots: why do layers work?
Because fog lowers contrast with distance: what is near stays defined, what is far fades. That gradation is free depth, but you have to give it something to grade. Reflex-Mania observes that the foreground subject looks more saturated and contrasty, and everything beyond it loses contrast and saturation, which suggests greater depth.
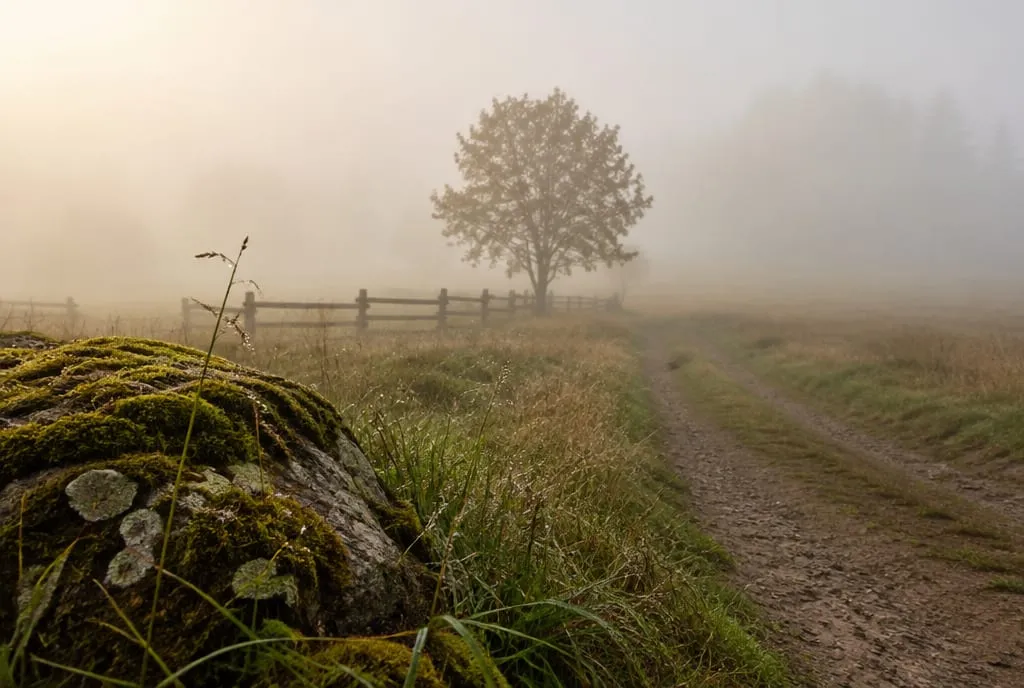 Three planes, one effect: the rock in the foreground is sharp and contrasty, the fence and the tree are paler, the trees at the back dissolve into white. Image generated to illustrate the concept, not a shot of a real place.
Build the frame like this:
- A sharp foreground. A rock, a stump, a branch, a stretch of path: Sony names small plants, stumps, rocks and paths as elements that invite the eye in. To choose well, read foreground interest in landscape photography.
- A paler middle ground. A tree, a fence, a roof: it gives scale and a bridge between the two extremes.
- A background that dissolves. Don’t fill it. Empty space is the fog working for you: see negative space.
Two more solutions that work well. The first is leading lines: a road, a path or a fence that enters from the foreground and vanishes into the white, as Viewbug and Kase suggest. The second is silhouettes: dark subjects against bright fog, exposing for the fog and letting the subjects go dark.
Wide-angle or telephoto in fog?
It depends on what you want to show. Kase points to wide-angle for the vastness of the scene and telephoto for isolating details. Sony makes a useful observation: the most spectacular fog pictures often come from a high vantage point above a veiled valley, with trees or buildings rising out of the blanket. It adds that with a wide-angle the scene can look less dramatic than it does in person: a telephoto helps you pick the right elements and leave room around them so the fog reads.
According to Reflex-Mania, a telephoto also makes fog look denser and a wide-angle makes it look lighter. If you have only one lens, try both focal lengths on the same subject: you will know in two frames.
How do you use light in fog?
Fog is a huge diffuser: light arrives soft, without hard shadows. To see how the character of light changes, read hard light vs soft light. Then you have three opportunities:
- Backlight. Shoot toward the low sun and the fog lights up; in woods, according to Reflex-Mania and Viewbug, rays of sun filter between the trees. This is where the risk of clipped highlights is highest: lower the compensation and check the histogram. The rules are in backlit photography: how to expose.
- Sunrise and sunset. With the sun low, fog can turn orange and surface texture stands out more (Reflex-Mania). The bigger picture of light is in how to read light in photography.
- Artificial light. In town, street lamps and headlights in fog create atmosphere, and black and white handles the contrast between lights and darks well (Kase, Reflex-Mania).
How do you protect your camera and lens from moisture?
With a few precautions. Bring a lens cloth and wipe off condensation now and then, because droplets settle on the glass (Kase). Avoid changing lenses in very humid air, so you don’t bring moisture onto the sensor. Keep the camera sheltered until you start, because sudden temperature changes are hard on it, and keep spare batteries warm (Reflex-Mania).
How does Framia help with foggy photos?
On Framia, light and technique are two of the six analysis categories, alongside composition, optics, color and storytelling. Upload a foggy shot and you get a score for each category and an explanation of what works and what doesn’t, for instance whether your foreground carries the depth. The AI is a second opinion: how the exposure really went is confirmed by the histogram.
What to do next
A one-morning test to find out which compensation your camera needs. You need a tripod and a frame with three planes.
- Check the forecast: you are looking for a clear, still night followed by a damp morning. Be on location before sunrise and set up the tripod.
- Compose with a sharp foreground, a middle ground and a background in the fog. Set RAW, minimum ISO, aperture priority at f/8 and focus manually on the foreground.
- Shoot the same frame three times, at compensation 0, +1 and −1. Change nothing else.
- Look at each histogram: which one has bright fog without clipped highlights and a foreground you can still read? Write your rule in one sentence, for example “in full fog I need about +1; with the sun in the scene I drop to 0”.
- Repeat twenty minutes later, as the sun climbs and the fog changes, and check whether the rule holds.
- Reset compensation to zero before you switch the camera off: if you forget, it ruins the shots of your next outing.
For a second opinion, upload the shot you like best to Framia and see how it rates light and technique. To learn how a photo is judged across every criterion, read how to tell if a photo is good.
FAQ
Should I shoot in auto or manual in fog?
Either works, as long as you check the histogram. In aperture priority with exposure compensation the meter rereads every frame, so the result changes when the amount of fog in the frame changes. In manual the exposure stays fixed, which helps when the light is steady, and there is no compensation to dial in: you set the exposure directly (unless you use auto ISO, in which case compensation adjusts the ISO).
Can I use flash in fog?
Better not to. Reflex-Mania compares it to pointing your car's high beams at a wall of fog: the flash lights up the droplets in front of the lens and you get a white wall instead of a scene. Work with the light that is there, whether natural or from street lamps.
What time does fog burn off?
After sunrise, as the air warms and the droplets evaporate. The Midwestern Regional Climate Center explains that under overcast skies, where the ground warms less, fog can last much of the day. That is why it pays to be in place before first light and to shoot early.
Can I photograph fog with my phone?
Yes. In low light a phone lengthens its exposure, so keep it still: elbows tucked in, the self-timer so pressing the button doesn't shake it, and a small tripod if you have one, as Reflex-Mania suggests. If your phone can shoot RAW, use it, so you can fix contrast and white balance later.
Can fog be faked in post-processing?
Only in part. Viewbug points out that you can imitate a veil of haze with editing tools, but real fog has a depth, with light fading as you move away from the subject, that effects only approximate.