Snow Photography: Why It Looks Gray and How to Fix It
 by Marco Carotenuto · · 10 min read
You walk out after a snowfall convinced you have seen a world of pure white. At the computer the snow is the color of concrete, or faintly blue, and the picture feels flat, with nothing for the eye to settle on. Snow is hard to photograph for three reasons: the meter darkens it, shade tints it blue, and a white expanse offers little to look at. All three are fixable once you know what the camera is doing.
This guide covers why snow turns gray, how much compensation you need (the sources do not fully agree, and I will say so), how to read the histogram, how to remove the blue, and how to focus, shoot falling snow and compose. At the end there is a test you can do in one morning.
Why do my snow photos look gray?
Because the meter does not know it is looking at snow. It measures reflected light and tries to render the scene as a middle tone, roughly 18% gray. Fstoppers explains that when the frame is dominated by tones much brighter than middle gray, the meter cannot tell “bright by nature” from “overexposed” and pulls the exposure toward the middle. Snow turns gray, just as a black cat turns gray in the opposite situation.
ImageMaven puts it well: the meter is simply doing its job. Nothing is broken; the scene is just not the average the meter expects. You can see it in the histogram: snow, the brightest part of the scene, sits far from the right edge.
How much exposure compensation does snow need?
Start at +1 EV and adjust by the histogram. The sources I read in full are close to each other, but not identical:
| Source | Suggestion | Context |
|---|---|---|
| Fstoppers | +1 to +2 EV; about +1.7 if snow fills 80% of the frame; +1 usually enough with foreground and sky | Data pushed right without clipping highlights |
| Reflex-Mania | raise by 1 or 2 stops | The meter judges the scene too bright and underexposes it |
| Ken Rockwell | usually +1 stop; if it takes +2, whatever looks best | Under overcast skies; in full sun, he says, modern cameras often get it right on their own |
| ImageMaven | +1 in their example | If the histogram does not reach the right, you need more light |
| Jeff Parker | about +2 with a frame full of snow | Data almost to the right edge of the histogram |
The disagreement is mild but real: everyone pushes positive, the amount varies, and Rockwell claims the problem eases in full sun. ImageMaven adds a case: if the scene has dark and white areas about 50/50, or a deep blue sky next to the snow, the meter sees both and may manage on its own.
A reading that fits all of this, though it is my hypothesis and not a rule anyone wrote down, is that two things matter: how much of the frame is snow and how dark the rest is. The more the snow dominates, the more compensation you need; with dark subjects or a deep sky to balance it, you need less. So no single number works every time. The histogram decides.
How do I read the histogram on a snow scene?
Look for data near the right edge, but not touching it. Snow is the brightest part of the scene, so it should sit on the right: Parker wants data almost to the right edge, and ImageMaven shows the corrected histogram reaching the right side. Here is how to read it:
| What you see | What it means | What to do |
|---|---|---|
| Data in the middle or on the left, gray snow | Underexposed | Add positive compensation in 1/3-stop steps |
| Data near the right edge, not touching it | Right: white snow with texture | Shoot |
| Spike against the right edge, highlight warning on sunlit snow | Highlights lost: the snow is white but has no texture | Reduce compensation slightly |
| Shadows (trunks, fence) all against the left edge | Too much contrast for one frame | Accept that they go dark, or wait for softer light |
The last row comes from Parker: dark objects make exposure harder in a snowy scene, and in bright sun it may not be possible to hold detail in both shadows and snow. Two practical notes. The histogram on your screen is built from the JPEG preview, not the RAW file, so leave a small margin from the right edge. And compensation works in P, A and S modes; in full manual there is none, you set the exposure yourself, unless you use auto ISO, in which case compensation adjusts the ISO (Fstoppers).
Why does snow turn blue and how do I fix it?
Because the light in shade is blue and the camera does not always notice. ImageMaven explains that snow in shade, especially on a bright, sunny day, tends to go blue, and that with mixed color temperatures (shade and sun together) auto white balance struggles. Reflex-Mania adds that snow reflects both sunlight and ambient light, and ambient light is not white at every hour.
You have three options, simplest first:
- Shoot RAW and pick the white balance later. Three of the sources recommend it (Reflex-Mania, Orizzonti Fotografici, ImageMaven).
- Try the Cloudy or Shade presets, which warm the image (Reflex-Mania). A caution: in ImageMaven’s example, the Shade preset did not warm it enough.
- Use a neutral reference. Click a patch of fresh snow with the white balance picker in your raw editor, or use a lighter gray than usual. Tecnica Fotografica warns that you should not use the 18% gray card here but a tone close to the snow’s white, and suggests a slightly shaded area. In ImageMaven’s example the shaded snow needed well over 10,000 K to look white: a specific case, not a value to copy.
One tip of mine, about taste rather than technique: don’t erase all the cold. Slightly bluish snow in shade, next to warm sunlit snow, tells the truth about the light. The flaw is blue spilling onto parts that should be white.
What settings should I use for snow?
A cautious base, to be corrected with the histogram:
- RAW. It gives you room on exposure and white balance, the two problems of this scene.
- Aperture priority with compensation, or manual with histogram checks.
- A mid-to-small aperture, for example f/8-f/11 as a starting point if you want foreground and background sharp. Tecnica Fotografica also recommends a closed-down aperture for depth.
- Lowest ISO. Snow is bright; there is no need to raise it.
- Compensation back to zero at the end of the outing. Fstoppers calls it the mistake everyone makes.
How do I focus on a white expanse?
On a point with contrast, manually or with autofocus. A uniform surface gives autofocus nothing to lock onto: Reflex-Mania and Orizzonti Fotografici explain that the camera needs a contrast point. Find a branch, a rock, a blade of grass or a post at the same distance as your subject, lock focus, hold the button halfway, recompose and shoot (Reflex-Mania). On mirrorless cameras you can use focus peaking in manual focus (Orizzonti Fotografici).
How do I photograph falling snow?
It depends on the effect: a fast shutter for sharp flakes, a slow one for streaks. Parker suggests about 1/500 s to freeze flakes and slower than 1/100 s to get streaks. These are figures from a single source, and they depend on how heavy the snowfall and the wind are: try them and judge the result. If you change the shutter speed, compensate with aperture or ISO to hold the exposure.
Tecnica Fotografica also suggests flash in falling snow, so the flakes in the air reflect it. It is the only source that mentions it: treat it as an experiment, not a rule. The same source says the best moment is often at the end of the snowfall, when the brightness rises.
How do I compose when everything is white?
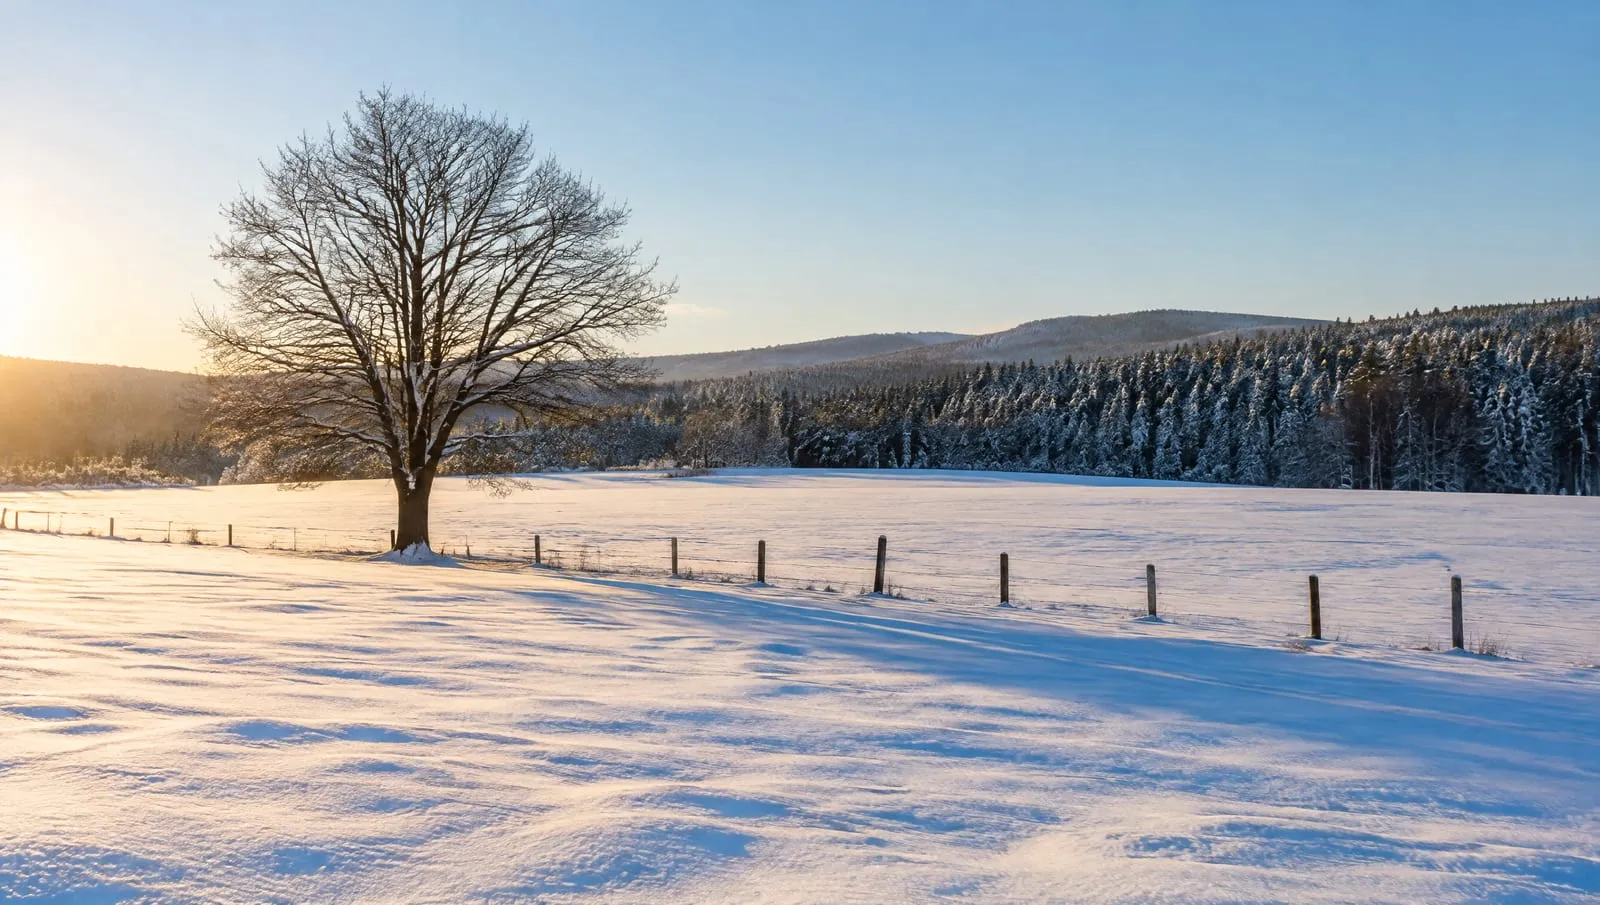
By giving the eye something to hold on to. Reflex-Mania warns that snow can be a flat, monotonous subject, and Tecnica Fotografica advises adding elements that create volume and shadow: a tree with its shadow, a building hit by a storm.
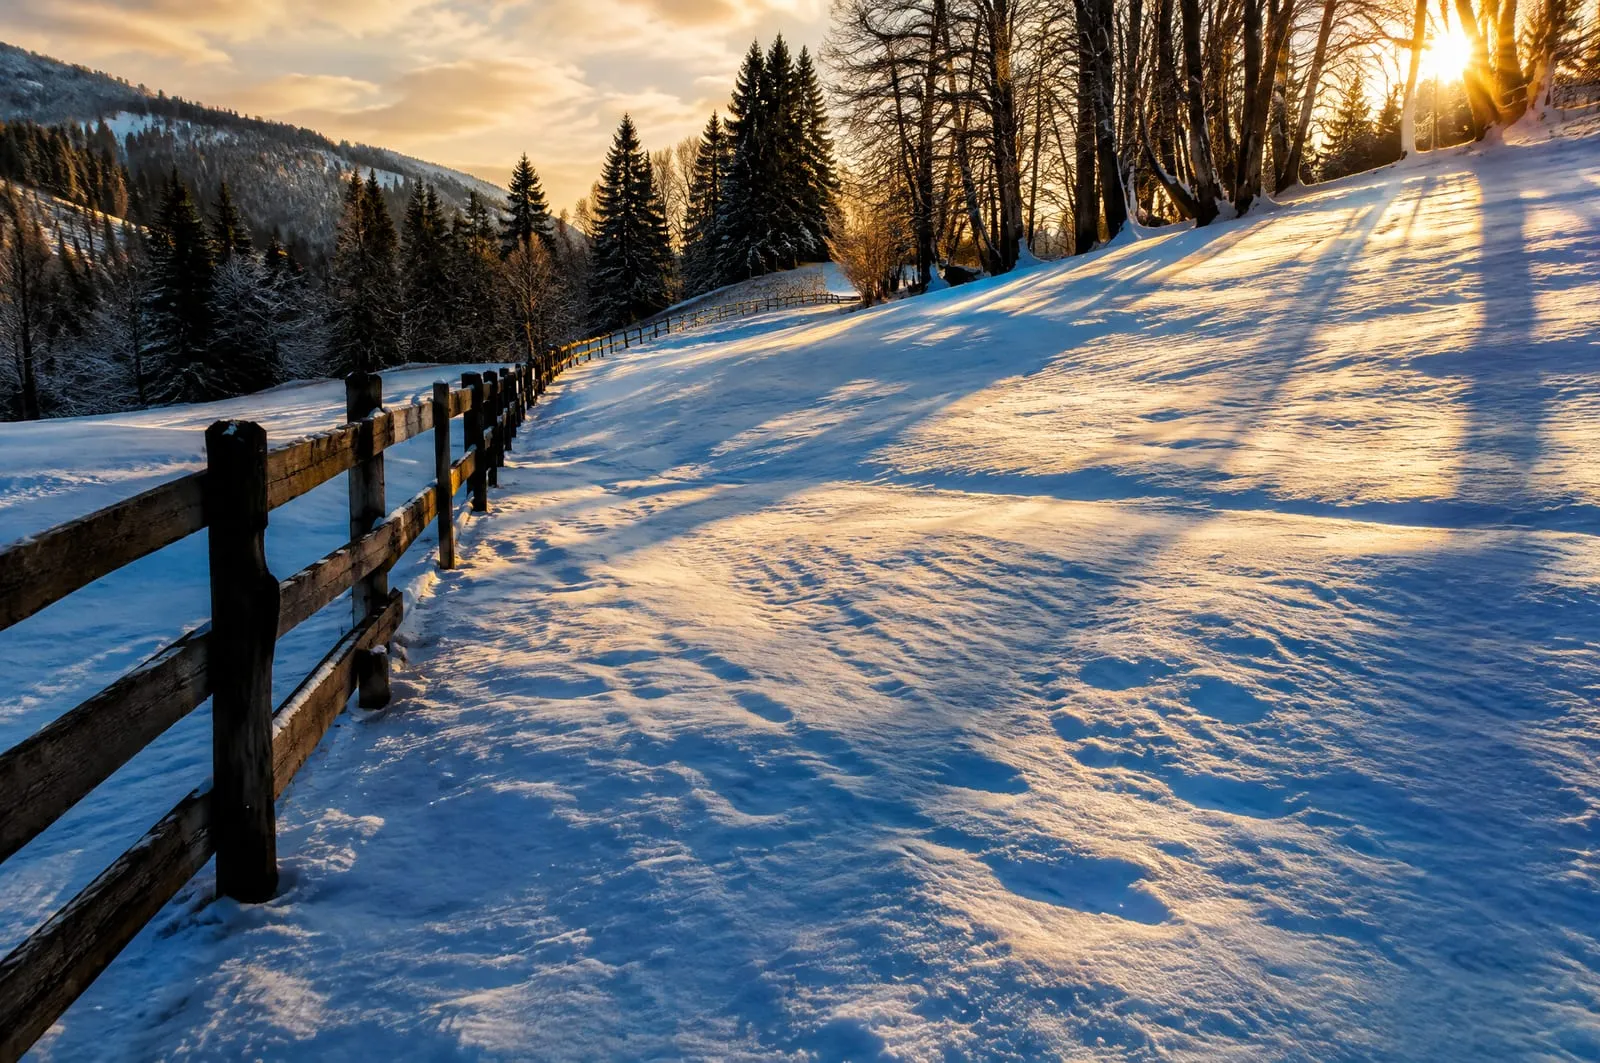 Three ingredients for a white expanse: the dark fence leads the eye into the scene, long shadows show the relief of the snow, and the contrast between warm sunlit snow and blue shaded snow makes it feel alive. Generated image to illustrate the concept, not a photo of a real place.
Some practical rules:
- Look for raking light. With the sun low, shadows carve out the relief of the snow and the surface stops being a blank sheet. To see why, read hard vs soft light and golden hour photography.
- Add a dark element. A fence, a trunk, a path: they work as leading lines and as foreground interest. But remember Parker’s note: dark objects complicate exposure, so check the histogram.
- Leave empty space on purpose. A small subject in a white field works if the emptiness is a choice: read negative space in photography.
- Don’t trample the scene. Parker lists it among his tips: footprints can add interest, but only after you have made the clean frames, because there is no going back.
- If the photo feels dull, it may not be just exposure: see why your photos look flat. Thick fog creates a similar situation with its own rules, covered in fog photography.
How do I protect myself and my camera in the cold?
A few precautions, all from Digital Photography School unless noted:
- Batteries. A cold battery lasts a fraction of its normal life. Start fully charged and keep spares inside your jacket.
- Don’t breathe on the lens. Warm, humid breath leaves a layer of frost on the glass, and wiping it usually smears it. Keep a hood or neck gaiter over your mouth and nose.
- Lens cap during breaks, and a rocket blower for flakes that land on the front element.
- Condensation when you go inside. A rapid move from cold to warm fogs lenses. Seal your gear in an airtight bag before going in and let it adjust for hours. Parker adds that you should remove the battery and card and seal everything in your bag while you are still in the cold.
If you are heading out for a specific scene, plan light and weather too: the method is in how to plan a photography trip.
How does Framia help with snow photos?
On Framia, light and technique are two of the six analysis categories, along with composition, optics, color and storytelling. When you upload a snow photo you see a score for each category and an explanation of what works and what doesn’t, for example whether the scene holds together or stays flat. The AI is a second opinion: whether the snow is truly blown out or gray is confirmed by the histogram and your own eyes.
What to do next
A one-morning snow test to find your compensation and your white balance. You need your camera, RAW, and a frame with snow, a dark element and, if possible, a patch of shade.
- Set RAW, lowest ISO and aperture priority. Check that compensation is at zero.
- Compose with mostly snow and one dark element (a trunk, a fence).
- Shoot the same frame at compensation 0, +1 and +2. Change nothing else.
- Look at each histogram: in which one is the snow white, with texture, and without a spike against the right edge? Write your rule in one sentence, for example “with snow filling the frame I need about +1.5; with the sun in the scene I drop to +1”.
- Pick the best frame and test white balance: auto, “Shade”, and a patch of snow as a neutral reference in your raw editor. Which one makes the snow white without killing the cold feel of the scene?
- Set compensation back to zero before you switch the camera off.
Then upload your favorite frame to Framia and see how it scores light and technique. If you want to understand how a photo is judged across all criteria, read how to tell if a photo is good.
FAQ
Can I photograph snow with my phone?
Yes, and the problem is the same: the phone tends to darken snow. Ken Rockwell describes the fix on an iPhone: press and hold on the important part of the image until it says AE/AF LOCK, then slide the sun icon next to the box upward until the snow looks right. Other phones may look different, but the idea is the same.
Do I need a tripod when snow is this bright?
It can help, even though shutter speeds are short. Reflex-Mania and Tecnica Fotografica both point out that in the cold you shiver, and gloves make the controls hard to feel, so camera shake is a real risk. A tripod, or at least a monopod, removes the problem.
Should I reset exposure compensation afterward?
Yes, every time. On many cameras it stays set even when the camera is off, as Fstoppers, Reflex-Mania and Orizzonti Fotografici all warn. If you leave it at +1.7, your next indoor shoot will be overexposed. Check the indicator at the start of every outing.
Is full sun different from overcast when shooting snow?
According to Ken Rockwell it is: in full sun modern cameras usually get snow right, while under overcast skies they cannot tell white snow in dim light from a gray object in bright light and darken it. The other sources I read do not make that distinction, so don't rely on a rule: check the histogram.
How do I keep snowflakes off my lens?
Use a lens hood and carry a rocket blower. Digital Photography School's David Shaw says a cloth smears and smudges, while a blower pushes the flakes away. Check often: if you can see blur in the viewfinder, the earlier frames are already affected.