Leading Lines in Photography: 6 Types With Examples
 by Marco Carotenuto · · 8 min read

You found a road, a low wall or a fence, framed it carefully, and the shot still doesn’t work: the eye runs down the line and then has nowhere to stop. Usually the problem isn’t the line. It’s where the line ends up.
Here you’ll find the six types of leading lines and what each one says, where to put your subject, a three-check test to see whether a line is working for you, and an exercise for a single outing. Leading lines sit alongside the rule of thirds among composition tools; to see how much composition weighs in the overall judgment of a shot, start with how to tell if a photo is good.
What are leading lines in photography?
Leading lines are real or implied lines inside the frame that guide the viewer’s eye toward the subject or the heart of the image. They can be bold or subtle, straight or curved, and they can come from an object, a row of objects, a shadow or a contrast of light.
They can be almost anything: a road, a river, railway tracks, a row of posts, the edges of a boardwalk, a shoreline. Adobe and Digital Photography School both say it plainly: if it looks like a line and can guide the eye, it can work as a leading line.
Why do leading lines work (and when don’t they)?
They work because the eye follows lines: it starts at one end and goes to see where they finish. If the subject is at the end, you’ve chosen the viewer’s path. If there’s nothing there, or an edge, the eye is left with no destination and the photo feels empty.
So a leading line has three parts: an entry (where it starts), an arrival (where it ends) and an aftermath (what happens once the eye gets there). Almost every failure sits in the arrival or the aftermath, which is why a three-check test comes up further down.
What are the 6 types of leading lines?
There are six, and each says something different. The table shows what each one does, where the subject tends to go, and the risk to watch for.
| Type | What it says | Where the subject goes | Risk |
|---|---|---|---|
| Horizontal | Calm, stability | Where the line breaks or changes | Carries the eye out of the sides |
| Vertical | Strength, height | At the top or base of the line | Splits the photo in two |
| Diagonal | Movement, distance | At the start or end of the diagonal | Points into an empty corner |
| Converging | Depth | Near where the lines meet | An empty vanishing point becomes the subject |
| Curved | A path that carries the eye | At the end of the curve, or past a bend | A long curve that arrives nowhere |
| Implied | Direction without a real line | Where the gaze, shadow or contrast points | Invisible: check that they read |
Adobe describes the first four in similar terms: horizontals are common in landscapes and suggest stability, verticals convey strength and confidence, diagonals movement and distance, and converging lines depth, with a road narrowing toward the horizon as the classic example.
Curved and implied lines deserve a couple of lines more. A curve has the advantage of carrying the eye through the whole scene, as the path in the cover image does: it starts at the bottom corner and bends several times before reaching the hut. Implied lines don’t exist as objects: they’re a person’s gaze, the long shadow of a building, a band of light or a patch of color that forces a route. Light contrast and color, PictureCorrect notes, can also act as leading lines.
Where do I find leading lines?
Look at the scene as if it were flat and search for anything long and continuous. One simple trick: squint, or look at the screen, where the scene collapses into shapes and the lines stand out more than the rest.
A few places to look right away:
- In the city: sidewalks, tracks, railings, rows of streetlamps, arcades, stairs, building shadows.
- In the countryside: dirt roads, vine or crop rows, fences, dry-stone walls, furrows in a field.
- In the mountains and by the sea: trails, streams, ridgelines, shorelines, waves, footprints and dunes.
- Indoors: a table edge, floorboards, rays of light from a window.
Where do I put the subject relative to the line?
Put it where the line arrives, or on the line near its end. That one rule holds the rest together: the line has a destination, and the destination is the subject. If the scene has a strong line but no subject, wait for someone to walk through it or look for another viewpoint.
In the image below, the edges of the boardwalk converge and the small red cabin sits exactly there. The eye has no choice: it enters at the bottom, climbs the two yellow lines and stops on the red.
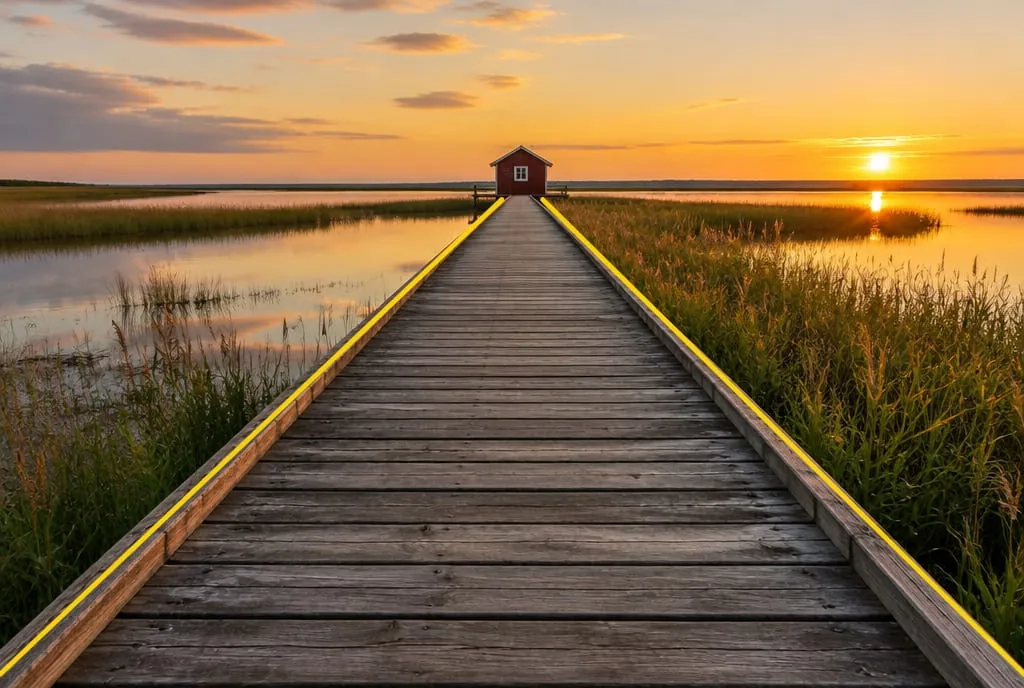 The edges converge on the cabin: the subject sits where the lines meet. Image generated to illustrate the concept; it is not a real photo of a real place.
To place the subject along the line you can lean on the grid: turn it on and check that the arrival point falls on a line or an intersection, as we explain in the rule of thirds. The two techniques help each other: the leading line gives you the route, the thirds tell you where to stop it.
What is the 3-check arrival test?
It’s a test for judging a leading line in a few seconds, before you shoot. It takes three questions, in the order the eye travels along the line.
| Check | Question | If the answer is no |
|---|---|---|
| 1. Entry | Does the line start at an edge or a clear point? | Crouch or move until it enters from an edge or a corner |
| 2. Arrival | Does the line end on the subject, or close to it? | Move the subject onto the line or reframe |
| 3. Aftermath | Once it arrives, does the eye stop on the subject? | Stop the line: a curve, an obstacle, a stronger subject |
An example for the third check: a straight road that passes beside the subject and runs on to the horizon. The eye reaches the subject, but the road carries it away. If the subject doesn’t have enough visual weight, the road wins.
What mistakes break a leading line?
There are four. The first two are by far the most common, and “leading to what?” is the question you read most often in forum critiques
- The line leads nowhere. A path or a fence with no endpoint doesn’t guide: it just takes up space. With no subject, the line has to be good enough to become one, and it rarely is.
- The line runs past the subject. It happens when the subject is small and the line is strong. As PictureCorrect points out, the line carries the eye past the subject when the subject lacks the visual weight to stop it.
- Too many competing lines. With a wide angle it’s easy to include a lot: if they all carry the same weight, none of them leads. Keep one main line and let the others sit in the background.
- Background and light that cancel them. A dark line in shadow, or in backlight, disappears. Before you shoot, check that the line stands apart from the rest by tone or color.
Below, a case of the second mistake. The road has a strong central line (in yellow) and the tractor sits to the side, circled: the eye climbs the road to the poplars and ignores the tractor.
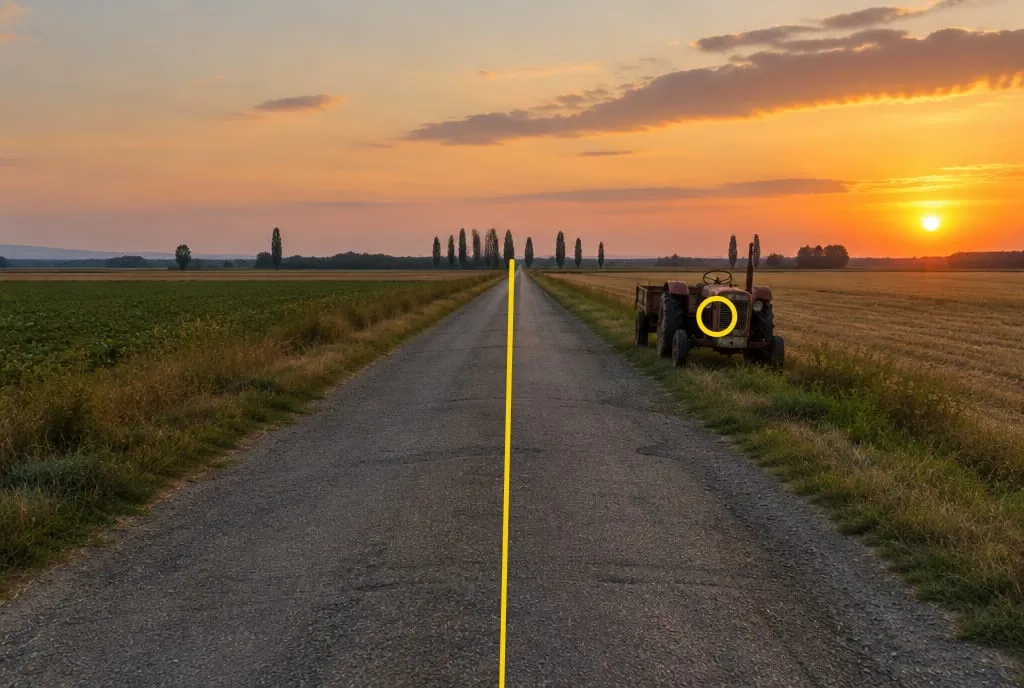 The road carries the eye to the poplars while the tractor stays off the route. To fix it: change your viewpoint until the road points at the tractor, or choose something that sits on the road as your subject. Image generated to illustrate the concept.
What lens and light work best?
A wide angle helps because it includes more lines and emphasizes convergence, especially if you crouch: the ground lines start at the bottom edge and rise toward the subject. A telephoto compresses the planes and makes lines more parallel, so look for curves or lines made by light and shadow.
For light, the usual logic applies: low sun, in the morning and evening, stretches shadows and turns them into leading lines, while flat overcast light erases them and leaves only the physical lines. If your photo feels short on depth, a foreground can help too; we cover it in why do my photos look flat.
What to do next
An exercise for a single outing, with one still subject (a bench, a boat, a door) and a line that reaches it:
- Find a long, continuous line: a road, a low wall, a path.
- Pick a subject and place it on the line, near where the line ends.
- Shoot the scene from three heights: standing, crouching and a few inches off the ground.
- For each one, run the arrival test: entry, arrival, aftermath. Write one line with the result.
- Take a fourth shot from the side so the line enters from a corner.
- View the four shots as thumbnails and pick the one where the eye stops on the subject. Note why: which check made the difference?
If you want a second opinion on how a photo of yours reads, AI photo analysis gives you a composition score with an explanation.
FAQ
Do leading lines always have to start in the foreground?
No. That's a habit, not a rule: a line can enter from a side, a corner or even partway into the frame, and it can run sideways, downward or toward you. What matters is a readable starting point and an arrival at your subject.
Can a leading line lead the eye out of the frame?
Yes, and it's the most common mistake: if the line runs past the subject and hits the edge, the eye leaves with it. Fix it by cropping, changing your viewpoint, or putting something on the line strong enough to stop it.
Do I need a wide-angle lens for leading lines?
No, but it helps: a wide angle includes more lines and exaggerates their convergence. With a telephoto the lines get flatter and more parallel, and curved lines or lines made by light and shadow tend to work better.
How do I use leading lines with a phone?
The same way: turn on the grid, crouch or move until the line enters from an edge and arrives at the subject, then shoot. A phone is also handy for trying several angles in seconds before you decide where to stand.