Foreground in Landscape Photography: How to Choose One
 by Marco Carotenuto · · 8 min read
You arrive somewhere beautiful, go wide, drop a few rocks into the bottom of the frame because “you need a foreground,” and the photo is still weak. The problem isn’t that something is missing at the bottom. It’s that whatever you put there has no job to do.
Below are three checks to judge a foreground before you press the shutter, a table of elements that usually work, and the practical choices that decide the result: size, height and sharpness. If your real problem is a lack of depth in general, start with why your photos look flat.
What is a foreground for in a landscape?
A foreground gives the viewer a way into the picture, a sense of scale and a separation between layers. A landscape with nothing close to the camera reads like a postcard; with a nearby element, the eye has somewhere to start and can tell how far away everything else is.
It can do three jobs, one or several at once:
- Entry point: a spot low in the frame where the eye lands before it climbs.
- Scale: an object whose size you know (a rock, a flower) tells you how big the mountain behind it is.
- Connection: a line, a stream or a path that links the bottom of the frame to the rest.
If an element does none of these, it’s filler. That is the whole difference between a foreground and “something at the bottom.”
How can you tell if your foreground works?
Run three checks, in order, even on the camera’s back screen. Each one is a yes-or-no question.
| Check | How to do it | If the answer is no |
|---|---|---|
| Cover test | Cover the bottom band of the photo with your hand or a crop. Does the photo lose anything? | The foreground is filler: change it or shoot without |
| Kinship | Is a color, shape, material or kind of light picked up somewhere in the background? | Disconnected element: find another, or change your viewpoint |
| Path | Does the eye travel from the foreground to the subject, or does it stop and slide out of the frame? | Move the element or the camera until there’s a direction toward the subject |
The second check borrows an idea from Spencer Cox at Photography Life: a good foreground completes the story of the photo and looks built for the background behind it, rather than being whatever happened to be nearby.
Try the cover test on the example below. The bottom band takes up more than a third of the frame, but if you cover it, the photo hardly loses anything. That’s the typical case.
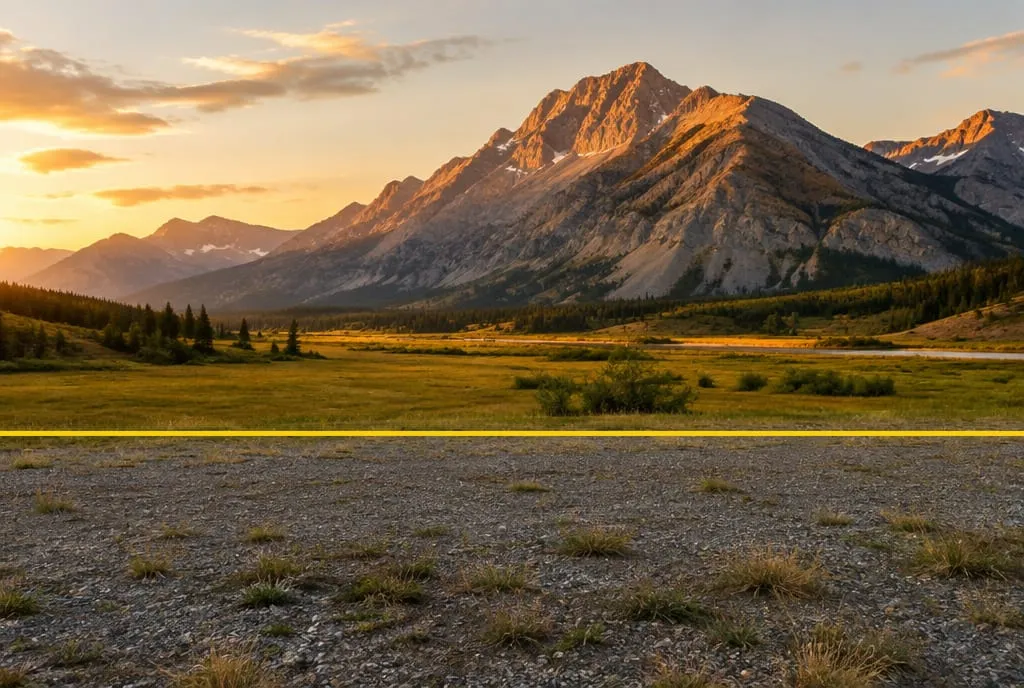 Generated example to illustrate the idea: below the yellow line there’s gravel and a few tufts, nothing that echoes the mountain or guides the eye. There’s a foreground, but it isn’t working.
Which elements make the best foregrounds?
It depends on the scene, but only a handful of categories work often. Each has a typical risk, and it nearly always shows up in the second or third check.
| Element | What it gives the photo | Typical risk |
|---|---|---|
| Boulders and rocks | Scale, texture, visual weight | Too big: they swallow the background |
| Flowers and grasses | Color, season | Too small next to the mountain |
| Water and reflections | Link between layers, repeated light | Reflection with nothing in it, dull sky |
| Paths and lines | A route toward the subject | A line that leaves the frame |
| Logs and roots | Shape, direction | Messy branches that distract |
| Snow, sand, gravel | Texture, direction of light | Uniform surface with no shape |
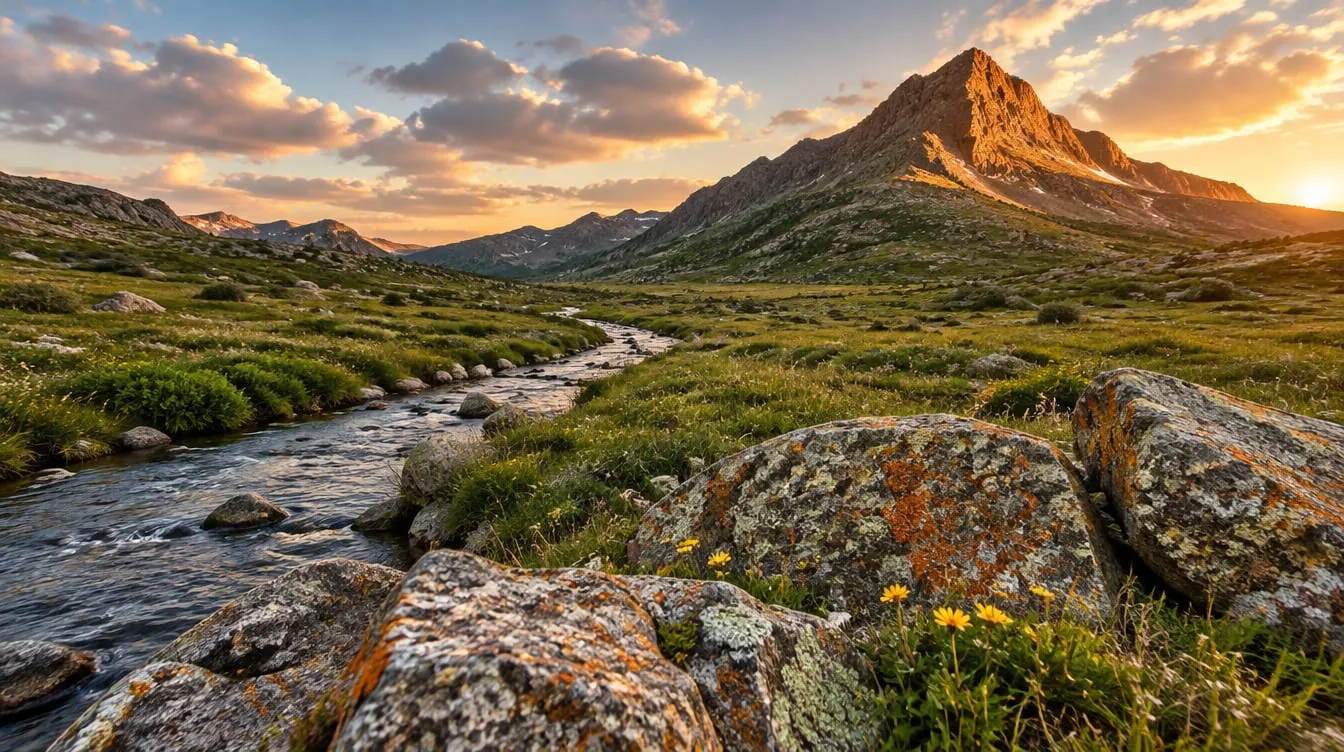
When the scene offers several options, pick the one that shares something with the background: the same warm color as the light on the peak, the same rock as the cliff, the same rhythm as a ridge. In the next image, the orange lichen on the boulder echoes the color of the light on the summit.
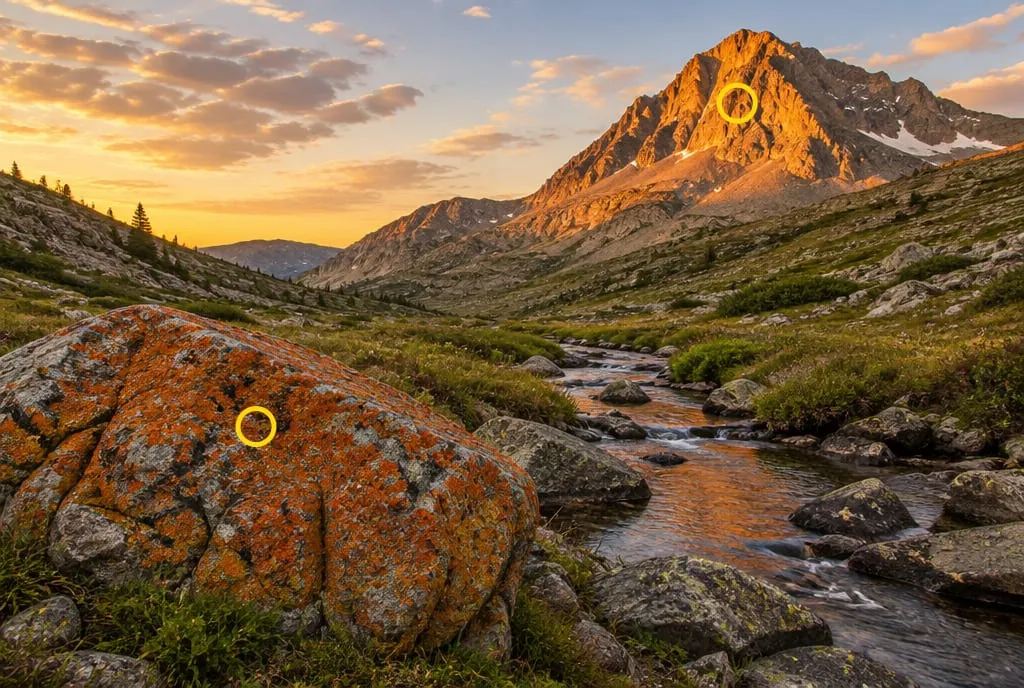 Generated example to illustrate the idea: the two yellow circles mark the color repeated between boulder and peak, and the stream is the path between them.
How big should the foreground be next to the background?
It depends on focal length and shooting distance. With a wide-angle lens and the element a few steps away, the foreground grows and the background shrinks; with a telephoto, the background looms and the foreground weighs less. Photography Life shows this with three shots of the same scene from different distances and focal lengths.
The classic trap: an ultra-wide lens and a small bunch of flowers inches from the front element. The flowers become enormous and the mountain disappears, so the photo looks “out of proportion.” You have three levers:
- Step back and use a slightly longer focal length: the foreground-to-background ratio gets closer to what you saw.
- Pick a larger element that can hold its own against the background.
- Drop the foreground and let the middle layers do the work.
On photo tours we often see people reach for the widest focal length the moment they face a spectacular view. It’s convenient, but it should be a choice, not wherever the previous shot left the zoom.
What height should you shoot from?
Going lower makes the foreground bigger and separates it from the background; going higher flattens it and shows more ground. There’s no single right height: it depends on the shape of the element.
- Small elements (a flower, a pebble): drop almost to ground level until they stand clear of the background.
- Long elements with a direction (a log, a row of rocks, a stream): go a bit higher so the line is visible in full and leads toward the subject. Picfair Focus makes the same point: a small rock needs a low tripod, while elongated rocks need a higher one.
- Always: shuffle a few steps left and right before shooting. The relationship between foreground and background changes with every step, much more than with the zoom.
As a starting point, put the element on one of the lower thirds. It’s the most common spot for a foreground, but it’s a starting point, not a law. For when to follow that guide and when to ignore it, read the rule of thirds.
How do you keep both foreground and background sharp?
With a nearby element, depth of field shrinks, so you need to stop down and choose your focus point carefully. A practical rule is to use a middle aperture (roughly f/11-f/16 on full frame, f/8-f/11 on APS-C, f/4-f/5.6 on Micro Four Thirds) and focus slightly beyond the foreground, about a third of the way into the scene, as Picfair suggests.
A way to check without charts:
- Shoot, then zoom to 100% on the edge of the foreground (the closest part).
- Zoom to the horizon or the summit.
- If either one is soft, shift your focus point a little toward the soft part and try again.
- If you can’t get both sharp, take two frames, one focused on the foreground and one on the background, and blend them in editing (focus stacking).
Don’t stop down all the way “just to be safe”: past a certain point, diffraction takes away more sharpness than it adds.
What if you can’t find a good foreground?
Then don’t force one. A landscape can work with a strong middle layer, with a telephoto that compresses the planes, or by making the foreground the subject itself. A random element added “because you need one” is worse than a clean composition without it. Photography Life says as much, and Picfair asks that a foreground be visually interesting, related to the scene and a real addition to the image.
A few ways to look before you give up:
- Walk around for two minutes, looking down instead of at the view.
- Look for water: even a puddle gives a reflection that can serve as a foreground.
- Wait for the light: an ordinary element at midday becomes interesting when the light skims it from the side.
How much does the foreground affect your score?
Mostly it affects composition, and through it depth and storytelling. Among Framia’s six criteria, a filler foreground leaves composition half-finished: the photo is tidy but has a hole at the bottom. A connected foreground with a path is one of the few moves that improves it without changing place or gear. For the full picture of the six criteria, see how to tell if a photo is good.
What to do next
A twenty-minute exercise, with any scene that has an interesting background:
- Find three candidates for a foreground within a few meters and note them by eye.
- Run the three checks on each: cover test, kinship, path. Discard any with two “no” answers.
- With the best one, take two shots: close with a wide focal length, and farther back with a slightly longer one.
- Take a third shot crouching lower and a fourth a hand’s width higher.
- Look at the four shots as thumbnails. Which has the foreground you understand instantly? And in which does covering the bottom change the photo most?
- Write one sentence: what job the foreground does in your chosen shot (entry point, scale or connection).
If you want a second opinion, upload the photo to Framia and look at the composition score: the explanation tells you whether the foreground is working or just filling space.
FAQ
Does every landscape photo need a foreground?
No. With a telephoto lens, or a scene that already has strong middle layers, you may not need one, and a forced foreground makes the photo worse. If nothing you find passes the three checks, shoot without one, or make the foreground itself the subject.
What is the difference between foreground and middle ground?
The foreground is whatever is closest to the lens, usually in the lower part of the frame. The middle ground sits between it and the background: a meadow, a stream, a forest. Keeping them distinct gives the scene its layered structure.
Can the foreground be out of focus?
Yes, when the blur is a choice, for example flowers softly framing a distant subject. But grass or stones that are blurred by accident read as a focusing mistake, because the eye looks for a sharp spot to enter the picture.
How do I stop the foreground from blocking my subject?
Step sideways or lower the camera a few centimeters: nearby elements shift across the frame far more than distant ones. If it still blocks the subject, pick another element, or step back and use a slightly longer focal length.