Storm Photography: Safety and Technique
 by Marco Carotenuto · · 10 min read
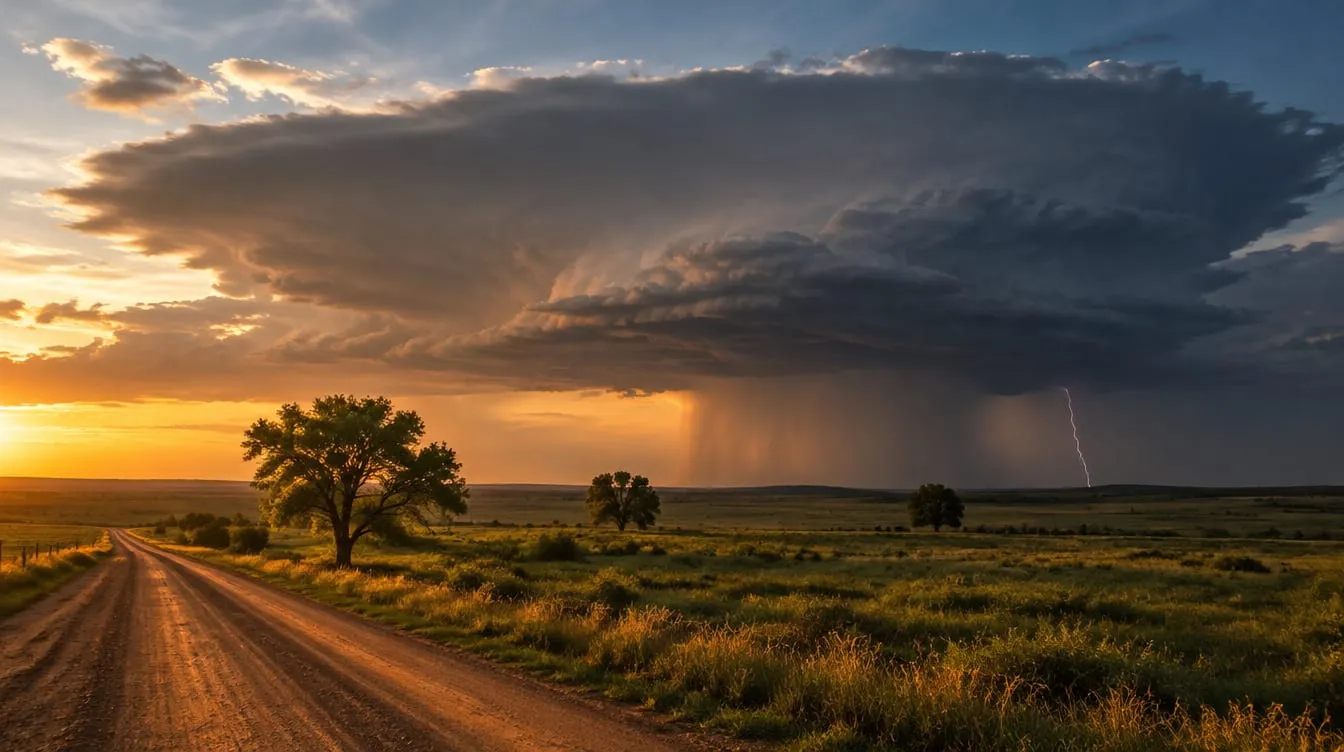
There is a black wall of cloud on the horizon and a band of amber light beneath it: the moment every landscape photographer waits for. Storm photography is also one of the few kinds of photography where a mistake costs far more than a wasted frame. So this guide goes in a fixed order: first the rules that keep you safe, then the technique for lightning and dramatic skies.
You’ll see when you must stop shooting, how far away to work, and where the sources disagree, as they do on crouching in the open. Then come gear, settings for day and night, composition, and an exercise you can do before the next storm arrives.
Can you photograph a storm safely?
Never completely: there is no safe place outdoors when a thunderstorm is in the area. The National Weather Service puts it bluntly: if you hear thunder, you are likely within striking distance. The rule is to go at once into a substantial building with electrical or plumbing systems, or into an enclosed vehicle with a metal roof and the windows up, and then to stay there at least 30 minutes after the last thunder (NWS).
Three beliefs common among photographers are wrong, according to the sources I read:
- “If it isn’t raining, I’m fine.” The NWS says lightning often strikes more than three miles (about 5 km) from the center of the storm, well outside the rain, and “bolts from the blue” can land 10 to 15 miles (16 to 24 km) away.
- “I’m sheltered under a roof.” Gary Hart is clear: shelter from rain is not shelter from lightning. A covered patio, a bus stop, an open shed, a tree or a cave won’t protect you.
- “Metal attracts lightning.” The NWS says height, pointed shape and isolation decide where a bolt lands, not metal. Metal does conduct, though, so stay away from fences, railings and metal structures.
What this means in practice: your safety plan starts before you shoot, not when the sky turns dark. For the weather and location side of the planning, read how to plan a photo outing.
How far from the storm should you be?
Far enough that you can’t hear the thunder, and always with shelter a few seconds away. The sources give different numbers:
| Source | Guidance | Reason |
|---|---|---|
| Adobe | 5 to 20 miles (8 to 32 km) from the storm | Safer and, per Weingart, often prettier: you see the whole structure light up |
| Gary Hart | Beyond the distance where you can hear thunder; shelter no more than a 30-second sprint away | Thunder is usually audible up to about 8 miles, at 5 seconds per mile |
| NWS | At least 6 to 8 miles (10 to 13 km) from the previous flash | A 1998 study cited by the NWS: half of flashes land about 9 km from the previous one, not the 3 to 4 km once assumed |
These don’t contradict each other, they come from different angles. A practical rule that ties them together: if you can hear thunder, you are already too close. Sound travels at roughly 5 seconds per mile (about 3 seconds per km), so thunder arriving 40 seconds after the flash puts the bolt around 8 miles away. But remember the NWS warning that a bolt can strike well beyond that from the storm. Hart adds a useful clue: if you find yourself reaching for an extreme wide-angle such as a 12-24 or a 16-35, assume the lightning is too close. With a moderate telephoto you work from farther away.
What if you get caught outside?
The honest answer is that you shouldn’t be there. If it happens, the sources disagree on one point, and I’ll say so plainly.
| Source | What it says about crouching on tiptoe |
|---|---|
| Adobe | If you can’t get inside in time, crouch on your tiptoes, as low as possible with minimal ground contact |
| NWS | It doesn’t make you safer: run to a substantial building or a hard-topped vehicle. You are not safe anywhere outdoors |
| Gary Hart | Of very little value: better to spend that time running to a safer place |
The institutional source, the NWS, and Hart converge: don’t count on the crouch. Lying down is worse, because it increases your contact with the ground and your exposure to ground current. Hart suggests avoiding high ground, exposed areas, isolated trees, water and metal structures, and keeping away from other people. The NWS adds that standing under a tree is the second leading cause of lightning casualties. None of this removes the risk, it only reduces it: the real protection is the escape plan.
What gear do you need for storm photography?
Whatever keeps the camera steady and lets you stay away from it. The basics:
- A stable tripod. Essential for long exposures (Adobe, Universo Foto). Its material makes no difference to safety (Hart).
- A remote release or self-timer. A cable or app trigger lets you shoot from cover. Without one, set at least a 2-second self-timer to avoid shake from pressing the button (Universo Foto).
- A wide-angle, but not necessarily an extreme one. Mike Olbinski puts most storm scenes between 14 and 35 mm. Universo Foto mentions 16-35 and 24-70 mm. Here the sources diverge: Hart treats an extreme wide-angle as a sign that the lightning is too close. One possible reading, and it is my own hypothesis, is that a wide-angle is fine for framing the storm’s structure from far away, and becomes a warning sign if you need it because you are too close.
- Rain protection. Adobe warns it can rain even miles from the storm: keep the camera under cover or shoot from the car.
- Optional: a lightning trigger and an intervalometer. The trigger fires the shutter when it senses a flash, useful by day with short exposures. The intervalometer repeats long exposures at set intervals, useful in the dark (Adobe).
What camera settings do you use for lightning?
Start from the light that is there, not from the bolt. A flash lasts a fraction of a second, so a longer shutter time doesn’t make it brighter: it only keeps the shutter open when the bolt arrives. How bright it turns out is decided mostly by aperture and ISO. Adobe says the same in practice: narrow your aperture as the lightning gets closer.
| Situation | Shutter | Aperture | ISO | Source and note |
|---|---|---|---|---|
| Night | 10 to 30 s | about f/11 | not given | Universo Foto: under 10 s you may miss the bolt, over 30 s it can “fade” in the frame |
| Evening, residual light | longer than 1/60 s, as long as possible without overexposing | narrow | not given | Adobe: take a test shot and adjust |
| Daytime or sunset | short; example 1/4 s | very narrow, f/18 | 50 | Hart, a sunset example; Adobe suggests a trigger |
These numbers are not rules: they are examples from different sources under different conditions. Your own experiment is this: take a test frame and read the histogram. If the sky is blown out before the bolt even arrives, the shutter time is too long, the aperture too wide or the ISO too high.
Other points the sources agree on:
- Manual focus. In the dark autofocus won’t lock. Adobe suggests focusing on a distant light before you start, then leaving the ring alone.
- Lens stabilization off when the camera is on a tripod (Adobe).
- Low ISO. With long exposures or residual light it gives you room to keep the shutter open without overexposing, and it lowers noise. Hart’s example is at ISO 50.
- RAW. You can recover highlights and white balance later (Adobe).
How do you shoot a dramatic sky without lightning?
By looking for the structure of the storm and the light under the cloud base. Many of the best storm pictures have no bolt at all: they have an anvil cloud, a rain curtain and a slice of warm light on the landscape. Olbinski advises including buildings, trees or a stretch of landscape in the foreground to add depth and scale.
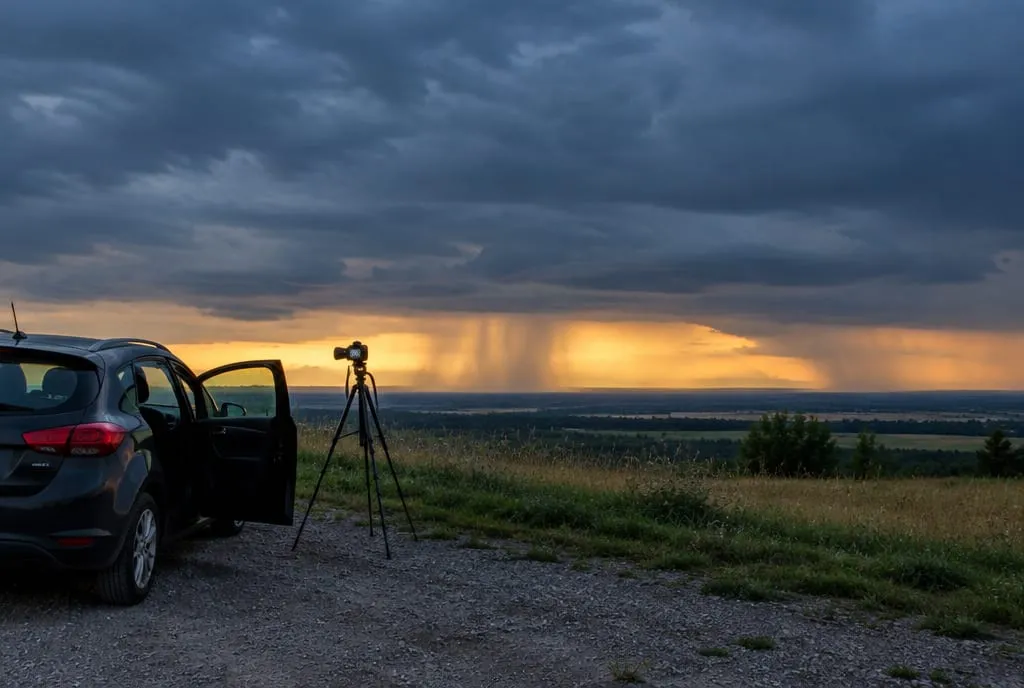 The storm is far away and fills the sky, the landscape is only a strip at the bottom, and the shelter, the car, is a few steps from the tripod. Image generated to illustrate the concept, not a shot of a real place.
Three choices matter with a sky like this:
- Low horizon. If the sky is the subject, give it two thirds of the frame. The reasoning is in where to put the horizon.
- Exposure from the histogram. Between the dark cloud and the bright strip on the horizon the contrast is high. Check that the data on the right doesn’t touch the edge: if it does, reduce the exposure. If the sun is in the scene, the rules in backlit photography apply.
- A foreground that holds up against the sky. A tree, a road, a roof: something dark and readable that doesn’t compete with the cloud. The bigger picture of light is in how to read light in photography.
Shots with lightning follow the same logic: a bolt on its own is a bright line, and the picture works when it has a landscape to talk to.
How do you get several bolts in one picture?
By shooting many frames from the same position and then blending them. Adobe describes the method: open the images as layers, set each layer’s blend mode to Lighten, and the brightest parts, the bolts, stay visible. That is exactly why you need a tripod: if the framing shifts, the layers won’t match. If you publish the result, say that it is a composite.
How does Framia help with storm photos?
On Framia, light and technique are two of the six analysis categories, alongside composition, optics, color and narrative. When you upload a storm shot you see the score for each and an explanation of what works, for example whether the foreground holds up against the sky or the exposure left the sky without detail. It is a second opinion on the picture: safety in the field is up to you.
What to do next
An exercise to do before a storm, calmly and in safety, so you arrive ready for the next chance.
- Write down your escape plan: where the shelter is (an enclosed building or a car with a metal roof), how far it is and how long it takes to reach. If it is more than 30 seconds, choose another spot.
- Check the forecast and local alerts the day before and the morning of. Set the rule: at the first thunder you go in, and wait 30 minutes after the last one.
- In the evening, from a safe place, test exposure on any night scene: tripod, RAW, low ISO, f/8 to f/11, manual focus on a distant light, 2-second self-timer. Take 10, 20 and 30 second frames and read the histogram. Note which works.
- Practice focusing on a distant light and check sharpness by zooming in on the screen. Then don’t touch the ring again.
- When the storm comes, shoot from inside a solid building or from the car with a remote, as Adobe suggests. If you hear thunder, no frame is worth a step outside your shelter: don’t go out to adjust the framing, and wait 30 minutes after the last thunder.
Then upload your best frame to Framia and see how it scores light and technique. For the full picture of how a photo is judged, read how to tell if a photo is good.
FAQ
Can I photograph lightning from inside my car?
It is the most sensible option, but not risk-free. The National Weather Service names an enclosed, metal-topped vehicle with the windows up as safe shelter, and Gary Hart adds that it is the metal body that protects you, not the tires, and that fiberglass bodies don't work. Photographer Jason Weingart, quoted by Adobe, points out that you are only fully safe inside a building. Put the camera on a tripod and trigger it with a remote, so you can stay under cover.
What shutter speed do I need for lightning?
It depends on the light. At night Universo Foto suggests 10 to 30 seconds at around f/11; Adobe only says that anything longer than 1/60 second improves your odds of catching a bolt. By day Gary Hart's example is 1/4 second at f/18 and ISO 50 at sunset. The reason is the same: a flash lasts a fraction of a second, so shutter time just keeps the shutter open when it arrives, while how bright the scene turns out is decided mostly by aperture and ISO.
Do I need an ND or graduated ND filter for lightning?
Not necessarily. Universo Foto notes that a plain ND also darkens the part of the scene that was already correctly exposed, while a graduated ND lets you balance the sky lit by the flash against the rest of the frame. Try aperture and ISO first before buying one.
Is a carbon fiber tripod safer than an aluminum one in a storm?
According to Gary Hart it makes no difference: the tripod's material does not protect you. What matters is not being near where the bolt discharges, meaning being inside a building or a closed car.
How do I get several lightning bolts in one photo?
Shoot many frames from exactly the same position, stack them as layers in an editing program and set each layer's blend mode to Lighten, so the brightest parts of every layer, the bolts, stay visible. Adobe describes it this way. You need a tripod, otherwise the layers won't line up.