Shooting in Harsh Sunlight: 6 Ways to Save Midday Photos
 by Marco Carotenuto · · 9 min read
You are somewhere beautiful, it is one o’clock and the sun is high overhead. The sky is a hard blue, the shadows are black, and the pictures on your screen look worse than the scene in front of you. That is not a failure on your part, and it is not a reason to put the camera away. Shooting in harsh sunlight works once you stop waiting for golden hour and start working with the light you have.
Below you will find why midday light is so hard to handle, how to expose so you don’t clip the highlights, six fixes to rescue a shot, and an exercise to try them in an hour. If you want the big picture first, start with how to read light in photography.
Why is midday light so hard to shoot in?
Because the high sun is a small, hard source coming from above: contrast is very high and shadows are short, so a landscape loses its relief. Photography Life sums up the problem as the difficulty of avoiding harsh shadows and bright highlights, which can leave you with a “contrasty mess.” The sun is the same small source we describe in hard light vs soft light: a cloud or open shade softens it, but the height of the sun doesn’t change.
How high the sun gets depends on season and latitude. At solar noon its elevation in degrees is 90 minus the latitude plus the solar declination. This is our own calculation, with rounded values for a place at 45° north (roughly Minneapolis, Milan or Montreal):
| Date | Sun elevation at solar noon | Shadow of a 6 ft (1.8 m) person |
|---|---|---|
| June 21 | about 68° | about 2.4 ft (70 cm) |
| Equinoxes (March, September) | about 45° | about 6 ft (1.8 m) |
| November 1 | about 30° | about 10 ft (3 m) |
| December 21 | about 22° | about 15 ft (4.5 m) |
Solar noon is not noon on your watch: with daylight saving time, the sun often peaks after 1 p.m. In practice, a November “midday” is more manageable than a July one, because the sun is never overhead and shadows have a direction that gives shape. In June, with the sun nearly above you, the shadows under noses and hat brims are black and horizontal surfaces such as meadows take all the light.
How do I expose so I don’t clip the highlights?
Expose for the highlights and let everything else go darker. When contrast exceeds what the sensor records in one frame, you have to choose what to sacrifice, and Rangefinder reminds us that blown highlights can’t be recovered. Photography Life gives the same advice for midday: keep highlight detail even at the cost of darker shadows, and don’t be afraid of negative exposure compensation.
- Shoot, then check the histogram. If the data touches the right edge in areas where you want detail (clouds, sand, pale walls), you are over.
- Lower exposure compensation 1/3 stop at a time until the important areas pull away from the edge. There is no fixed number.
- Don’t trust the screen preview. In bright sun the display is hard to read and shots look darker than they are. Trust the histogram.
- Shoot RAW. A dark shadow can be lifted in editing, at the cost of some noise; a clipped highlight won’t come back.
- If the background is much brighter than your subject, choose. Either expose for the background and the subject becomes a silhouette, or expose for the subject and the background clips. There is no free compromise.
What are the 6 ways to save a midday photo?
Six choices, from simplest to most involved: change the subject, step into shade, polarize, expose for the highlights, reduce the sky, convert to black and white.
| Fix | Works when | Risk |
|---|---|---|
| 1. Look for shapes and shadows | Walls, stairs, rocks, details, cities | Doesn’t help much with grand vistas |
| 2. Open shade | People, flowers, details, forest paths | Cool color cast; sunlit background clips |
| 3. Polarizer | Foliage, wet rock, water, sky 90° from the sun | Costs up to about 2 stops; uneven sky on wide lenses |
| 4. Expose for highlights | Every shot | Very dark shadows |
| 5. Less sky | A white or washed-out sky | Changes your composition |
| 6. Black and white | High-contrast scenes | If color was the subject, you lose it |
1. Look for shapes and shadows, not the panorama
With a high sun, a shadow doesn’t ruin the scene: it can be the scene. Spencer Cox of Photography Life says his first instinct at midday is to look for shadows that lead to an interesting composition, and that it works better for details and cityscapes than for grand landscapes. A dry-stone wall, a staircase, a roofline: the crisp shadows between elements become a pattern. When a dark shadow acts as empty space in the frame, see also negative space in photography.
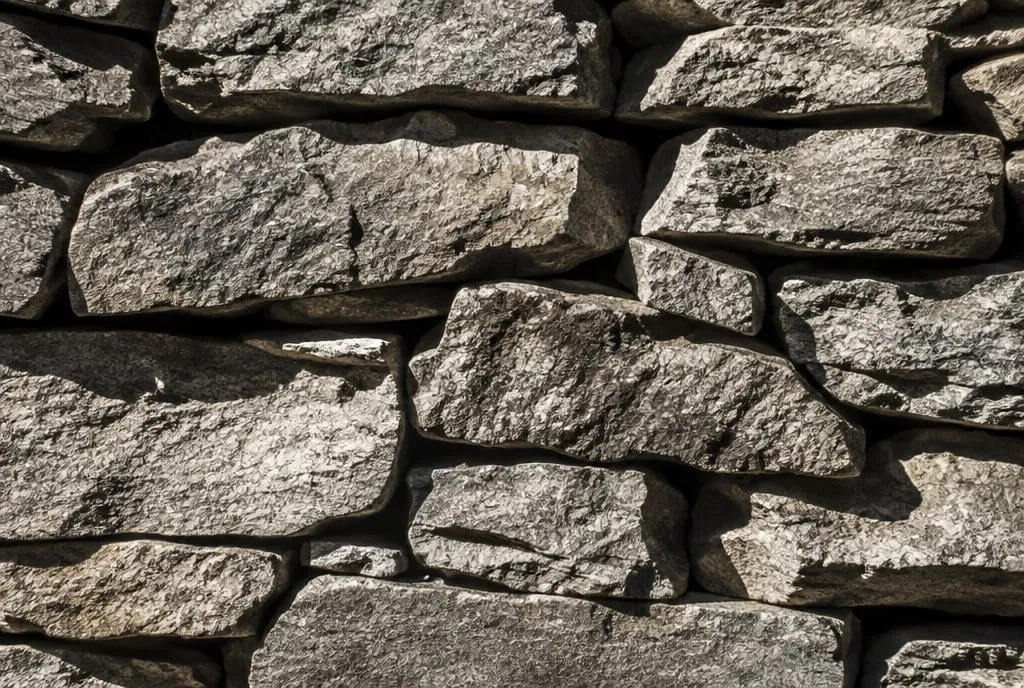 In strong sun, the shadows between the stones become the picture’s design: here the hard light is the subject, not the problem. Image generated to illustrate the concept, not a photo of a real place.
2. Move your subject into open shade
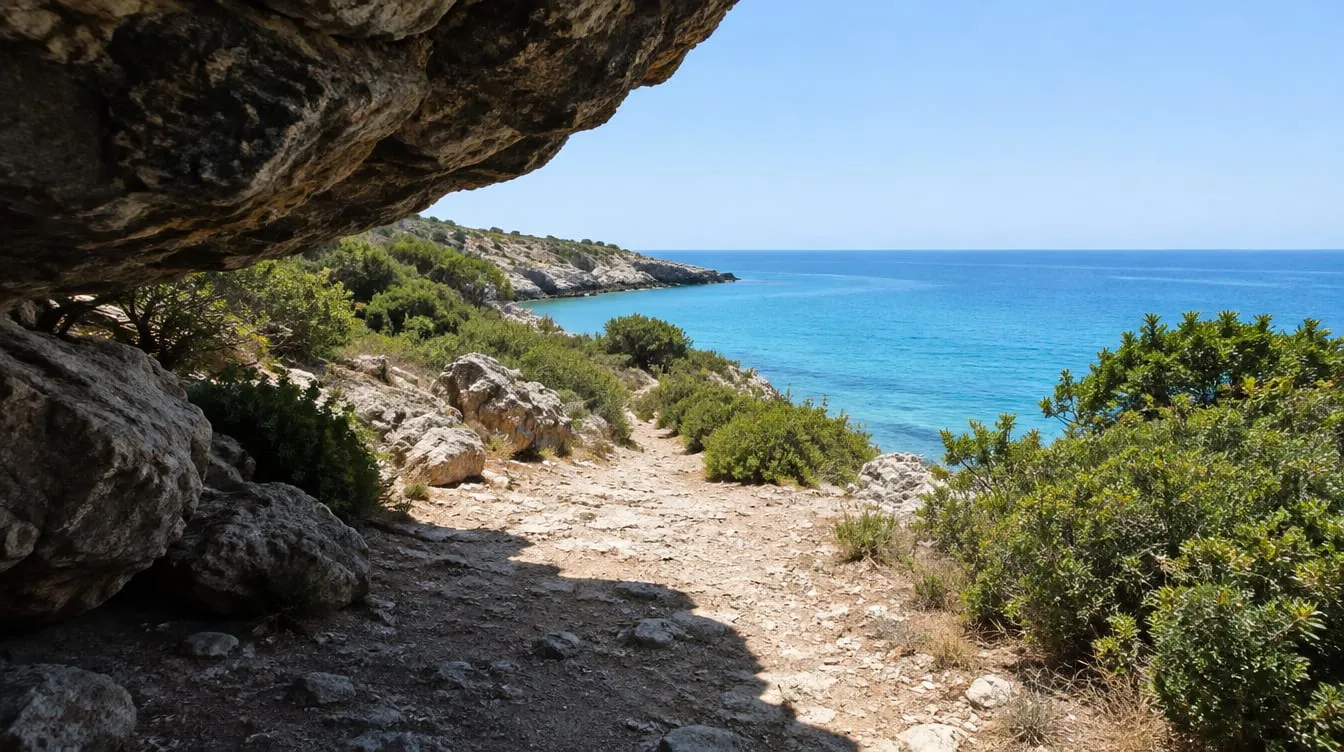
Open shade is the fastest way to soften light: the subject is lit by the whole sky instead of the sun alone. A boulder, a wall, the edge of a forest or a porch gives you shade even on a cloudless day. Two cautions: the light in shade is cooler, so check your white balance, and if a sunlit area also enters the frame, the contrast problem comes back. The cover photo shows exactly that: the shaded path reads well, but the sunlit sea is far brighter and you have to decide which to expose for.
3. Use a polarizer for sky, foliage and water
A polarizer cuts reflections from non-metallic surfaces, so it removes the bright veil from leaves, wet rock and water and lets color and detail come through. According to Wikipedia it also darkens the sky, but only in the band about 90° from the sun, and the effect is visible within 15°-30° of the best direction. There is also a reason to use it in the field: a photograph doesn’t record the polarization of light, so the effect on reflections can’t be recreated in editing.
With a very high sun the useful band of sky shifts toward the horizon, which is where the effect shows. The price is lost light, up to about two stops according to Canon as cited by Wikipedia, and at midday you can afford it. Rotate the ring while looking through the viewfinder: the strongest effect is easy to find by eye.
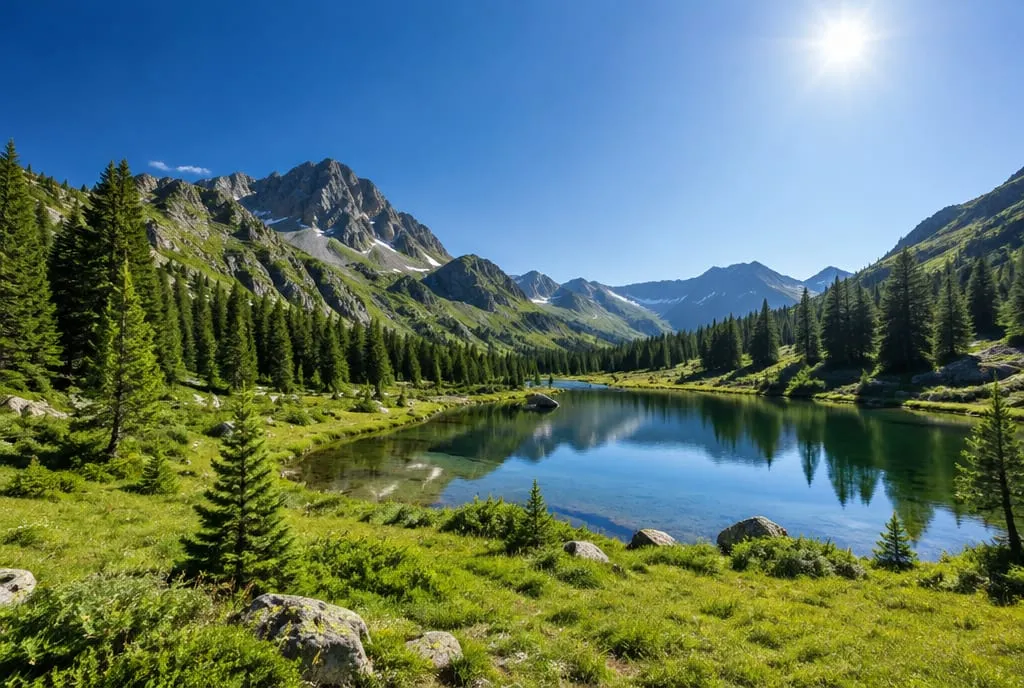 The sky is deeper and more saturated away from the sun and paler beside it: that pale area is where a polarizer has the least to offer. Image generated to illustrate the concept, not a photo of a real place.
4. Expose for the highlights, even when shadows go black
The other fixes won’t help if the highlights are clipped, so use the histogram routine above on every shot. When shadows are your subject (fix 1), darkening them is part of the design: let the blacks be black, as long as no detail you care about is lost.
5. Reduce the sky, or leave it out
With a high sun the sky is often the most troublesome area: washed-out and nearly white, or an intense, heavy blue. If it is white, it is an empty patch with no information in a landscape: frame lower and give weight to the ground. If it is clean blue, a polarizer enriches it but doesn’t add interest, and a low horizon turns it into a big void. For more on this, see where to put the horizon in a photo.
6. Convert to black and white
Black and white works when contrast is the subject and color is just noise. Rangefinder notes that images with a wide tonal range, like those shot in harsh light, convert well; Photography Life suggests it as well when color is drab. It is not a shortcut: decide on black and white before you shoot, looking for shapes, lines and shadows, rather than to rescue a photo with no subject.
Is midday always the hour to avoid?
No, but if you can choose, choose something else. Photography Life says it plainly: good light beats drab light by definition, and yet you can still make wonderful photographs when conditions aren’t ideal. For a travel photographer both are true. The low, side-on light of morning and evening gives relief and color, as explained in golden hour photography, but travelers rarely choose their hours, and it is often at midday that you find yourself standing in front of the place. Then you have the six fixes, or you can use those hours to scout and decide where to come back when the sun is low. If you want a trip built around the right light, you will find programs at WeShoot.
How does Framia evaluate it?
Light is one of Framia’s six categories, along with composition, optics, color, storytelling and technique. It gets a score from 0 to 100 with an explanation of what works and what doesn’t. If you shot the same scene in sun and in shade, analyze both photos and compare the scores with what you see yourself: it is a second opinion on your choice of light.
What to do next
A one-hour exercise for the middle of a sunny day, to try the fixes on a single subject.
- Choose a still subject with a sunlit part and a shaded part: a wall, a staircase, a tree trunk, a path.
- Shot A: frame it normally and let auto exposure do its thing. Check the histogram and note where the highlights clip.
- Shot B: same framing, but with negative exposure compensation until the important highlights pull away from the right edge of the histogram.
- Shot C: change the framing. Remove the white sky, or frame a detail where shadows make a pattern.
- Shot D: put the subject, or yourself, in open shade and shoot again. If you have a polarizer, try with and without it, rotating the ring.
- View the photos as thumbnails. Which fix helped most? Write one sentence: “At midday, with this subject, I would…”
For a second opinion, upload your favorite to Framia and look at the light score. If the sun is in front of you and you lose the subject, read backlit photography: how to expose it; if your photos come out dull, see why your photos look flat.
FAQ
What time of day is the worst for photography?
There is no fixed hour: what matters is how high the sun is. The higher it is, the harder and more vertical the light, and the shorter and flatter the shadows on a landscape. At 45° north the sun at solar noon sits about 68° above the horizon in June and about 22° in December, so the same "noon" is a very different light from one season to the next.
How much should I underexpose in bright sun?
There is no value that always works: it depends on the scene and the sensor. Use the histogram instead. Shoot, check whether the data touches the right edge in areas where you want detail (sky, clouds, pale surfaces), and lower exposure compensation until it pulls away, even if the shadows get darker. In RAW, shadows recover better than clipped highlights.
Does a polarizer work with a wide-angle lens?
Yes, with a catch: the effect on the sky is not even. According to Wikipedia, the degree of polarization varies across a wide field of view, so you can see a gradient from lighter to darker blue. On foliage, wet rock and water the effect is more regular, because it comes from reflections rather than from a band of sky.
Polarizer or ND filter at midday?
They do different jobs. A polarizer manages reflections and sky and costs up to about two stops; an ND filter is mainly for longer shutter speeds and can cut far more light. Neither reduces the contrast between sun and shade: for that you need open shade, careful exposure or a different subject.
Is it worth waiting instead of shooting at midday?
If you can choose, yes: the low, side-on light of morning and evening gives shape and depth that midday lacks. But when you travel you often can't choose the hour, and shooting in tough light teaches a lot. The six fixes exist so you don't have to put the camera away during the middle of the day.