Why Are My Photos Blurry? Shake vs Motion Blur Fixes
 by Marco Carotenuto · · 9 min read
You get home, open a shot on your computer and the subject is soft, with doubled edges. The usual reflex is to stop down the aperture or raise the ISO, but if the cause is something else, that fix does nothing. Before you change a setting, work out what moved: the camera or the subject.
This guide shows you how to tell blurry photos apart with a 30-second test, how to pick a shutter speed for your situation, and how to keep the camera still with or without a tripod. At the end there is a drill to find your real handheld limit.
How do I know if my photo is blurry from shake or just out of focus?
Zoom to 100% and look at what is sharp. The main causes leave different traces, and three questions find them: is anything sharp? Where? Which way does the smear run?
| What you see at 100% | Likely cause | First fix |
|---|---|---|
| Nothing is sharp; edges are doubled in the same direction across the whole frame; point lights turn into short streaks | The camera moved | Faster shutter, bracing or a tripod |
| Wall, street and still objects are sharp; only the subject is smeared along its direction of travel | The subject moved | A shutter speed matched to its speed |
| One area is sharp (the background, a nearby branch) but the subject is not | Missed focus or depth of field too shallow | Check the AF point and the aperture |
| The subject is softer than the background, but the background also has doubled edges | Both | Fix the camera first, then the subject |
The last row is where people go wrong when they start with speed: always fix camera movement first. Until the camera is still, you cannot tell whether your shutter is fast enough for the subject. DailyPhotoTips makes the same point, warning about photographers who keep shortening the exposure without diagnosing the cause and end up with a sky-high ISO and the same problem.
The test has limits: lens quality, depth of field and missed focus also produce soft photos, and some cases stay ambiguous. If you cannot get a clear answer, compare two frames of the same scene: if, at the same settings, one is sharp and the other is not, movement is the cause.
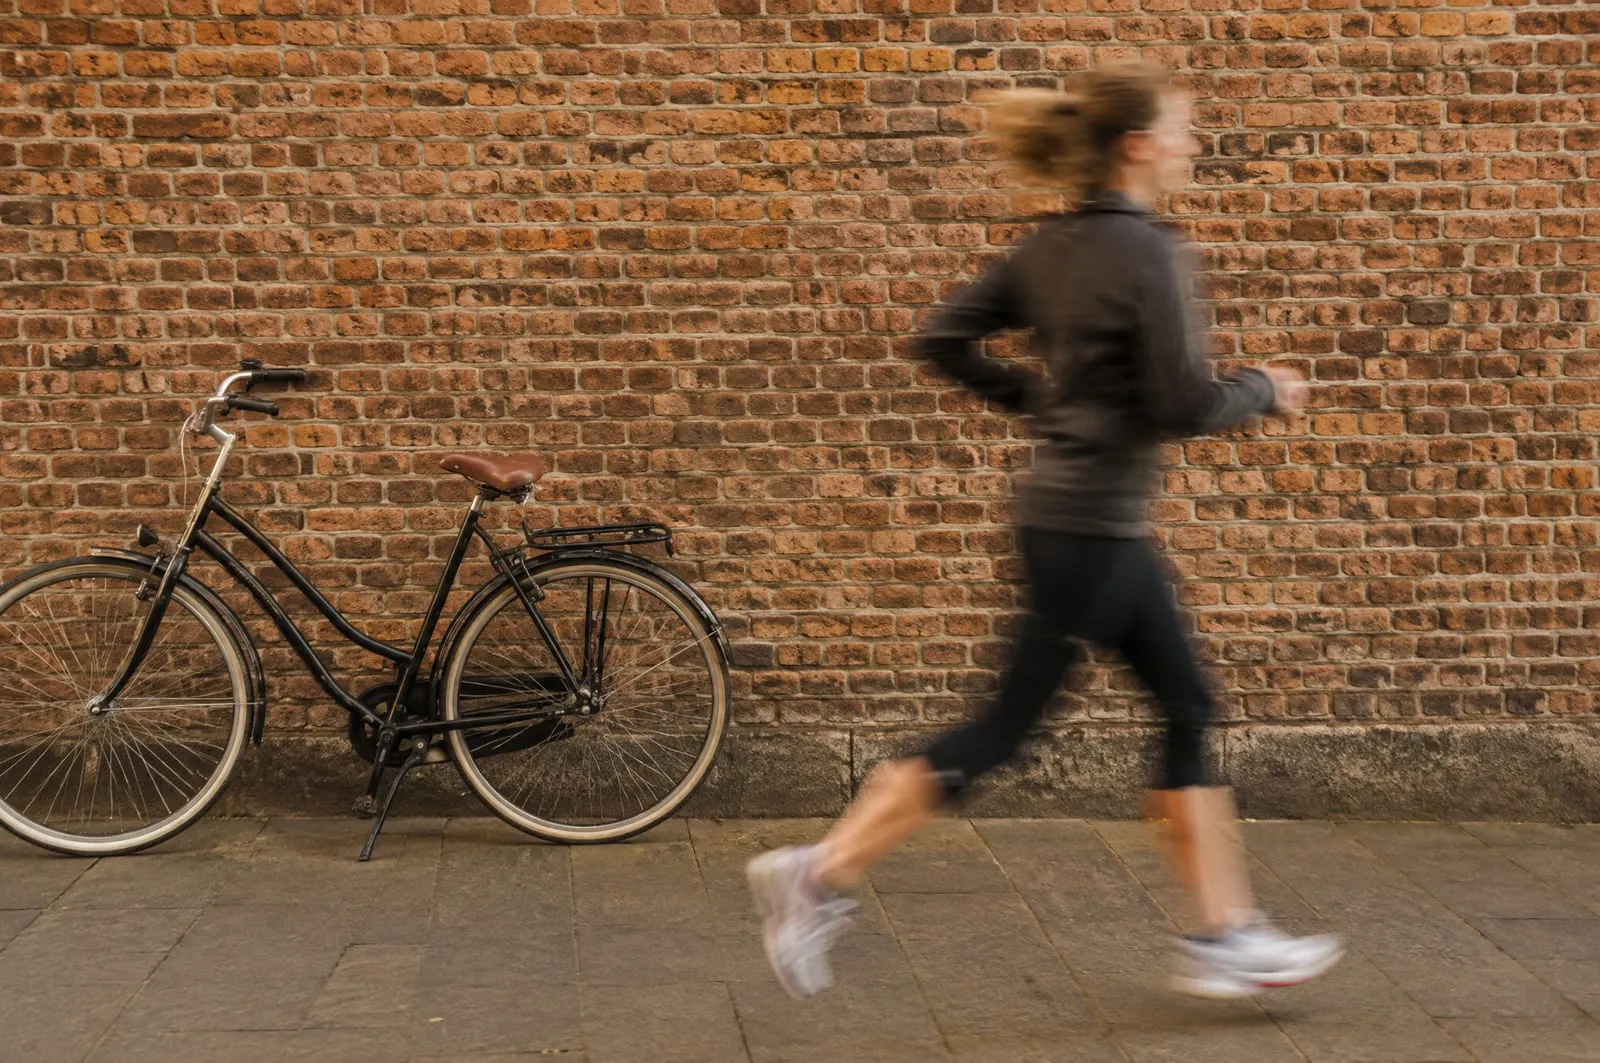 The classic case of subject motion blur: the wall, the bicycle and the pavement are sharp, so the camera was still; only the runner is smeared along the direction of travel. Generated image to illustrate the concept, not a photo of a real place.
What is the difference between motion blur and camera shake?
Camera shake means you moved; motion blur means the subject moved. The two look alike at a glance but need different fixes. In camera shake the whole image is dragged one way while the shutter is open. In motion blur the camera is steady and only the moving thing is smeared.
Photography Life stresses the same split: the reciprocal rule, which we cover next, protects you from camera shake and does nothing for a fast subject.
Slight shake is easy to miss because it hides in the preview. A shot that looks sharp on the camera’s screen may not be, so for any frame you care about, zoom to 100% on the spot, or use the 100% check from how to cull your travel photos. High-resolution sensors reveal shake more readily: Photography Life explains that more pixels in the same physical area means less tolerance for movement.
What shutter speed do I need to avoid blur when shooting handheld?
As a first guide, a speed at least equal to the reciprocal of the focal length: 1/50 s at 50 mm, 1/200 s at 200 mm. This is the reciprocal rule, and Digital Photography School presents it as a guideline rather than a law: longer focal lengths magnify movement along with the scene, so you need a faster shutter to compensate.
Three adjustments come from the sources:
- Cropped sensors. Multiply the focal length by the crop factor before calculating. Photography Life gives a 400 mm lens on a 1.5x Nikon DX body: 400 × 1.5 = 600, so at least 1/600 s.
- High-resolution sensors. They may need a faster speed, as noted above.
- Close subjects. In macro work, Digital Photography School points out, magnification rises even with short lenses, so add about a stop.
Opinions differ on the threshold. Some photographers argue that modern high-resolution sensors need roughly double the film-era figure (about 1/400 s at 200 mm), while Photography Life and Digital Photography School keep the classic rule as a starting point to adapt and test. There is no number that works for everyone; the drill at the end shows you how to measure yours.
A starting table, to adapt:
| Situation | Starting speed | Why |
|---|---|---|
| 50 mm handheld, full frame | 1/60 s or faster | Reciprocal rule, with a small margin |
| 200 mm handheld, full frame | 1/250 s to 1/400 s | The rule says 1/200; high resolution needs more |
| 200 mm on APS-C (1.5x) | 1/320 s to 1/500 s | Equivalent to 300 mm |
These are cautious values we derived from the sources, not guarantees of sharpness. Digital Photography School warns that in wind, when off balance, or when holding the camera away from your face (screen instead of viewfinder), the rule gives speeds that are too slow.
Is image stabilization enough?
It helps with the camera, not the subject. Stabilization compensates for hand movement, and its gain is measured in stops: each stop halves the slowest usable shutter speed. Digital Photography School puts the rated figure at roughly 3 to 5 stops on older gear and 4 to 7 on newer gear, especially when a stabilized body and lens work together.
An example: at 50 mm the rule says 1/50 s; with 3 stops you get to about 1/6 s (1/50 → 1/25 → 1/12 → 1/6). The real gain needs checking, though: the same source advises testing each camera and lens combination rather than trusting the rated number alone.
And here is the limit people underestimate: stabilization does not freeze a moving subject. At 1/6 s a still background will be sharp, but a walking person will still be a streak. For that you need a faster shutter.
How do I hold the camera still without a tripod?
Reduce the points where your body can wobble. The sources we consulted give roughly the same list:
- Viewfinder instead of the screen, if you have one. Pressing the camera to your face adds a third point of contact; with arms stretched out in front, the camera moves more.
- Elbows tucked in, right hand on the grip and left hand under the lens, supporting its weight.
- Feet staggered, knees slightly bent.
- Something to lean on: a wall, a tree, a railing. Even one hand braced against a post helps.
- Breathing: shoot in the pause between breaths and press the shutter gently.
What if I use a tripod and the photo is still blurry?
It can happen, because a camera on a tripod still moves: from pressing the button, from the mirror in a DSLR, from the shutter mechanism, from wind. Photography Life lists mirror and shutter-induced vibration among the common causes. The countermeasures are a two-second self-timer or a remote release (Digital Photography School recommends exactly that), mirror lock-up on DSLRs, and an electronic shutter on mirrorless cameras.
One caveat on the electronic shutter: it removes shutter-curtain vibration, but with moving subjects or some artificial lights it can produce artifacts, so it is not right for every scene. For a still subject on a tripod, it is one of the cleanest options.
If you shoot long exposures often, tripod and timer are the norm; you can see them applied in blue hour photography without noise.
How do I freeze a moving subject?
Pick the shutter speed from the subject’s speed, not the focal length. The reciprocal rule does not help here: Digital Photography School says so plainly, and Photography Life gives the example of birds in flight, which need at least 1/2000 s on a 500 mm lens where the rule would suggest 1/500.
| Subject | Starting speed |
|---|---|
| Person standing still | 1/125 s |
| Person walking | 1/250 s |
| Kids or pets running | 1/500 s |
| Sports, fast action | 1/1000 s or faster |
| Birds in flight, motorsport | 1/2000 s or faster |
These figures come from the DailyPhotoTips and Digital Photography School guides, and both present them as starting points. A walking pace changes with the person, and a subject moving toward you is easier to freeze than one crossing the frame.
When there is not enough light, you have three levers: a wider aperture, a higher ISO, or both. Each has a cost: less depth of field and more noise. The exposure triangle explains how to balance them. For a moving subject the practical rule is simple: a grainy sharp photo beats a clean blurry one. Noise can be softened in editing; blur much less so.
Blur can also be a choice: panning or silky water works because the rest is still. If it is intended, the photo has an idea; if it is an accident, it shows.
What to do next
A drill you can do indoors in about twenty minutes to measure your handheld limit. You need your camera, a prime lens (or a zoom locked on one focal length) and a high-contrast target: a printed page of text taped to a well-lit wall.
- Choose a focal length (say 50 mm) and work out the reciprocal-rule speed. On a cropped sensor, multiply the focal length by the crop factor first.
- Set shutter priority and an ISO high enough to cover every speed in the next steps. Turn stabilization off, for now.
- Shoot three frames at each of these speeds: the rule’s speed, one stop slower, two stops slower and one stop faster. Keep the same stance and grip.
- Zoom to 100% on the text. For each speed, count how many of the three frames are sharp. Your limit is the slowest speed at which all three are.
- Repeat with stabilization on and compare: how many stops do you really gain? That is your number, and it is worth more than any table.
- Run it again with a different technique, such as the screen instead of the viewfinder, and see how much it changes.
By the end you will have a minimum shutter speed that is yours, based on how you hold the camera, and a clear idea of how much technique matters. If you want a second opinion on a shot you already took, upload it to Framia: the Technique category gives you a score and an explanation, which helps you see whether sharpness is your weak point. To work from one photo and improve it shot by shot, read how to improve a photo in 3 shots.
FAQ
Can you fix a blurry photo in editing?
Only partly. Sharpening and deblur tools can improve slight blur, but they cannot rebuild detail the sensor never recorded, and the longer the smear, the less comes back. Treat them as a last resort and fix the problem at the shutter instead, with a faster speed or better support.
Why is my photo blurry even at 1/250 s?
There are three likely reasons. Your subject may be faster than 1/250 s can freeze, such as a running child or a bird in flight. With a telephoto lens or a very high-resolution sensor, the reciprocal rule may not be enough. Or it may not be blur at all but missed focus: check whether some part of the frame is sharp while your subject is not.
Should image stabilization be on when the camera is on a tripod?
It depends on the model, and guides disagree. A common recommendation is to switch it off on a tripod because the system can react to vibrations that are not there, but some cameras detect a tripod on their own. Your manual is the best source. If in doubt, shoot one frame with it on and one with it off and compare them at 100%.
Does a high ISO cause blurry photos?
No. A high ISO adds noise, not blur. Raising it lets you use a faster shutter speed, which reduces blur. The price is more grain, and a grainy but sharp photo is easier to live with than a clean but blurry one.
Why do photos look sharp on the camera screen but blurry on my computer?
The rear screen is small, so slight blur disappears at that size. It shows up when you zoom in or print large. For any shot that matters, zoom the preview to 100% before you leave the spot.