How to Cull Travel Photos in 20 Minutes (4 Passes)
 by Marco Carotenuto · · 8 min read

You empty the memory card and find over a thousand files: twenty near-identical panoramas, three versions of the same alley, a handful of test shots. Opening the first one and deciding “keep or delete” works for about twenty photos. After that, fatigue makes you keep everything or choose at random.
Here is a four-pass method with a time limit for each pass, built for the photos of a trip lasting a few days. If you have thousands of shots, run it one day at a time. The idea behind it: don’t inspect files one by one hunting for flaws; look for the ones that work. To know what “works” means you need a yardstick, and that’s what how to tell if a photo is good gives you.
How do you cull travel photos in 20 minutes?
With four passes in a row, each with a single job and a time cap. Doing one thing at a time avoids the classic mistake: zooming to 100% to check sharpness on a photo you haven’t yet decided is worth keeping.
| Pass | Time | What you do | What you don’t do |
|---|---|---|---|
| 1. Thumbnails | 3 min | Scroll everything in a grid and flag the shots that stop your eye | Don’t zoom, don’t delete |
| 2. Near-duplicates | 7 min | Group by scene and keep one photo per group (two only if truly different) | Don’t zoom to 100% if subject, edges and light are enough to decide |
| 3. Finalists | 6 min | Check subject, edges, horizon, exposure and sharpness | Don’t edit |
| 4. The set | 4 min | Look at the finalists together: what repeats, what’s missing | Don’t add weak photos to “fill” the story |
The time is a limit, not a goal: it stops the cull from turning into a second trip. If, halfway through pass 2, you still have hundreds of photos left to group, tighten the pass 1 filter (flag fewer shots) instead of stretching the clock.
Why look for the best shots instead of deleting the worst?
Because your problem is volume, and spending hours judging photos that will end up in the bin wears you out before you reach the good ones. Photographer Massimo Vignoli describes exactly this on Photography Life: after years of rejecting, he flipped his method to look for what “shines”, staying in grid view without zooming. From more than 11,000 frames of one trip, he says he identified the 2-3% worth working on in just a few hours.
Thumbnails have a practical advantage: they strip out detail and leave shapes, colors, contrast and how the elements are arranged. That decides whether a photo reads in a second, which is exactly what happens in a feed or on a print seen from across the room. A photo that says nothing as a thumbnail is unlikely to become strong just because you enlarge it.
Try the 3-second test: look at each thumbnail for one breath. If you can’t say where to look, don’t flag it. If you hesitate between yes and no, flag it: in pass 2 it will be compared with its near-duplicates and drop out there if it’s the weaker one.
How do you choose between near-identical shots?
Put them side by side and look for what one shows that the other doesn’t. When we shoot a scene we like, we take several variations. One good one is enough, unless the others tell something different.
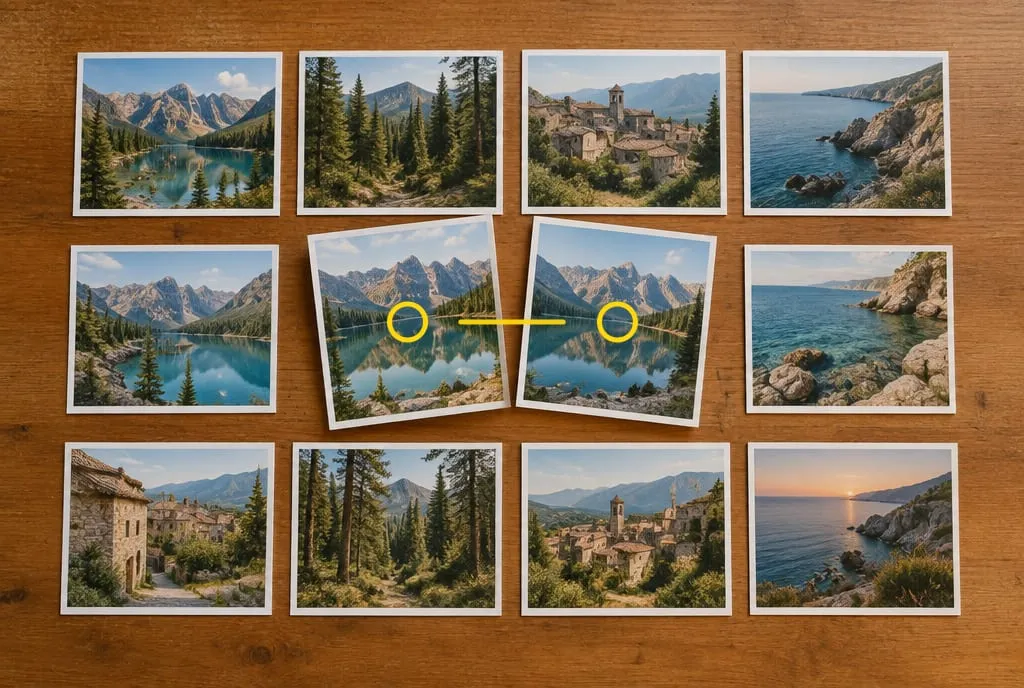 Two shots of the same scene should be compared side by side, not one at a time. The question here: which one leaves the subject clearer and the edge cleaner? Image generated to illustrate the concept.
Compare in this order and stop as soon as you find a clear difference:
- Subject: in which one does it read at once?
- Edges and background: which has fewer cut-off or intruding elements at the margins?
- Light and moment: which has better light, or a better moment (a cloud, a passer-by from behind, a reflection)?
- Sharpness: only if the earlier differences are nil, zoom to 100% and keep the sharper one.
Sharpness comes last for a reason: a well-composed, slightly soft photo can often be saved, while a razor-sharp one with a buried subject cannot. The exception is when blur or motion is intentional: then it isn’t a flaw, it’s a choice.
For the criteria you can borrow the questions from our guide to photo critique: separate verifiable facts (cut-off edge, tilted horizon) from taste (“I like the sky in this one more”).
What makes a travel photo worth keeping?
A keeper has at least one thing the others in its group lack, and no flaw that cancels its point. In pass 3, use these four labels rather than a 1-to-5 rating, which tends to put everything at 3:
| Label | When | What you do with it |
|---|---|---|
| Keep | Reads at once, clean at the edges, light or moment you won’t repeat | Edit and share |
| Second choice | Different from the first in crop, moment or viewpoint, but weaker | Stays in the archive, not published |
| Memory | Weak as an image but important to you (a face, a place, a day) | Separate folder, outside the set |
| Reject | Unintentionally blurred, unrecoverable exposure, duplicate with no difference | Delete, after backing up |
The “memory” label defuses the most common conflict. A photo with the perfect smile and the wrong exposure shouldn’t be compared with a well-composed landscape: the criteria differ. Keeping them in two folders lets you be strict with the set without guilt about the memories.
For the signals that make a shot look deliberate rather than accidental, our guide to amateur vs professional photos lists eight checks. Before pass 3 it also helps to look for recurring flaws. If many finalists look flat, with even light and nothing in the foreground, our guide on why photos look flat helps you decide whether they’re worth fixing in editing or better left out.
Why do your trip photos look better than they are?
Because you were there: the effort of the climb, the smell of the air, the light you watched change. Photographer David Shaw writes on Digital Photography School that shots from an intense day looked extraordinary to him a few hours later, and merely decent a week later: the difference was emotional distance. Review right after you get home and you judge the day, not the image.
Two practical fixes:
- Let the photos rest. If you can, do passes 1 and 2 on your return and postpone pass 3 by a few days. When you reopen them it’s easier to see them as a stranger would.
- Write one line for each finalist. “What does someone who wasn’t there see?” If you can’t answer without leaning on the memory (“but there was a gorgeous sunset”), the photo is a memory, not part of the set.
How do you know when to stop?
When the remaining photos tell the story of the trip without repeating themselves, and any addition would weaken the set. In pass 4, put the finalists on a single screen and check three things:
- Repetition: if two finalists do the same job (two similar panoramas, two alleys in the same light), keep the stronger one.
- Variety of framing: do you have a wide view, a detail and one with a human element or sense of scale? If the trip is all wide-angle, the set will feel monotonous.
- A start and an end: is there a photo that opens the story and one that closes it?
If pieces are missing, don’t fill the gap by lowering your standard: a shorter set beats one padded with three filler shots. To see why one image holds up alone and another doesn’t, you need explicit evaluation criteria, the same ones AI photo analysis is built on. It has a limit, though: it doesn’t know your trip, so pass 4 stays yours.
What to do next
A 20-minute exercise with the photos from your last outing (even a single day):
- Set a 3-minute timer and scroll all the thumbnails in grid view: flag the shots that stop your eye, without zooming.
- Group the flagged shots by scene. For each group with several photos, put the near-duplicates side by side and pick the one with the clearest subject and cleanest edges. 7-minute timer.
- On the finalists, run the pass 3 check: subject, edges, horizon, exposure, sharpness at 100%. Give each one of the four labels. 6-minute timer.
- Put the finalists on one screen and ask what repeats and what’s missing. 4-minute timer.
- Back up, delete only the technical rejects and leave the rest for a few days. Then reopen the finalists folder and compare your choice with your first pass.
If you’re torn between two finalists, upload both to Framia and compare the scores criterion by criterion: if they differ on a criterion that matters for your idea, you have your answer; if they’re level, pick the one that tells the trip better.
FAQ
How many photos should I keep from a trip?
There's no right number: it depends on what you'll do with them. A practical rule is one strong photo per scene, plus at most one second choice if it's genuinely different. A book or portfolio set will be much shorter than the archive you keep.
Should I delete rejects right away?
Delete only the obvious technical failures right away (unintended blur, unrecoverable exposure, test shots), and only after backing up. Let everything else rest for a few days: right after a trip, we overrate photos tied to strong emotions.
How do I choose between two nearly identical photos?
Put them side by side and ask what one shows that the other doesn't: a clearer subject, a cleaner edge, better light at that moment. Only if the answer is "nothing" should you compare sharpness at 100% and keep the sharper one.
Should I keep photos that are great memories but technically weak?
Yes, but in a separate folder. A photo can matter to you without working as an image. Keeping it apart stops you mixing the two criteria and accidentally sharing a shot that is only worth keeping as a memory.
Can an app do the culling for me?
For the mechanical work (grouping, flagging, comparing) any photo catalog will do. For the finalists only, a criteria-based analysis like Framia's can act as a second opinion, as long as it doesn't replace your own eye.