Telephoto Landscape Photography: Compressing the Scene
 by Marco Carotenuto · · 10 min read
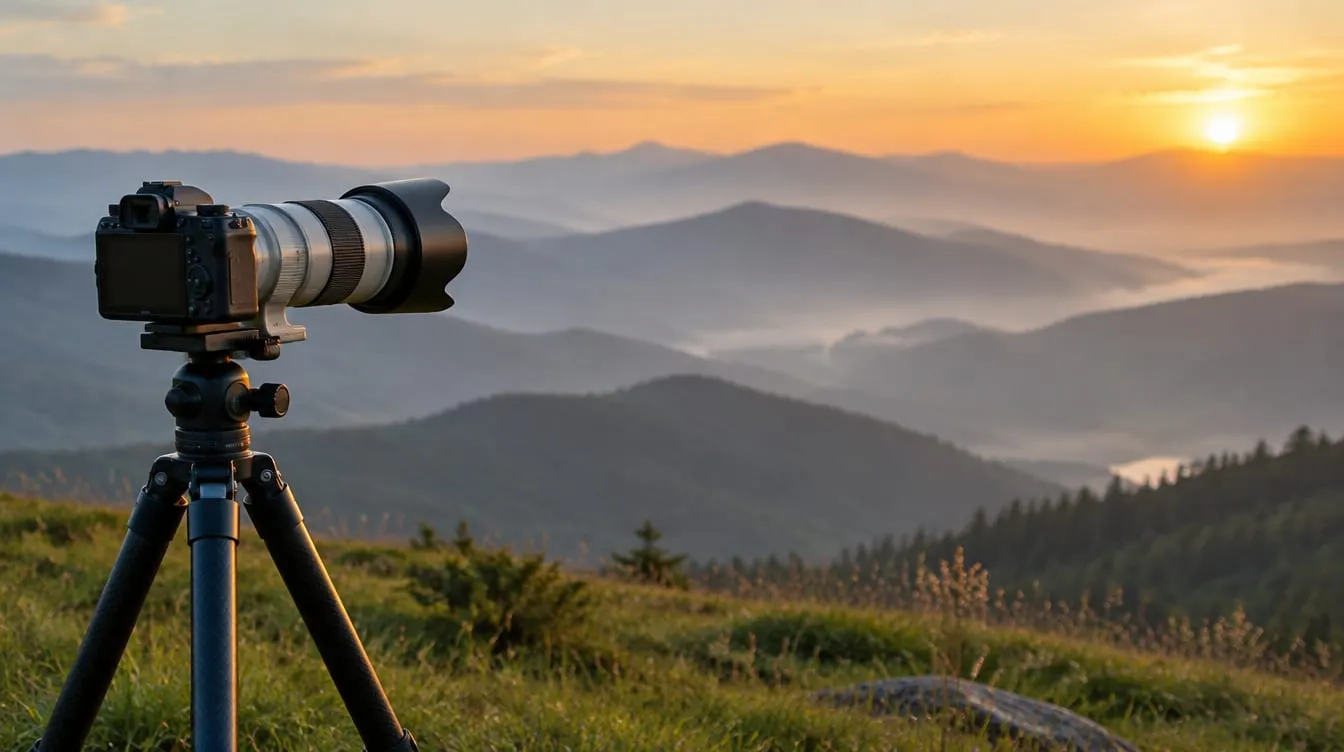
Faced with a big view, most of us reach for the wide-angle lens. Yet plenty of strong landscape photos are made with a telephoto: a lit ridge rising out of shadow, hills stacked in haze, a tiny tree against an enormous rock face. A long lens isn’t just for bringing distant things closer. It’s for choosing one piece of the world and tying together layers that look separate to the naked eye.
This guide to telephoto landscape photography covers where compression really comes from, how to use it, why long-lens landscapes often come out flat or soft, and what to do about it. If you’d like a refresher on focal length and perspective first, start with our guide to focal length.
What is telephoto compression?
It’s the effect where, in a shot taken with a long lens from far away, the layers look squashed together and the background looks huge next to the foreground. Cambridge in Colour puts it this way: a narrow angle of view “normalizes” the size and distance of near and far objects, so they end up looking alike.
The key point is that the cause is distance, not focal length. The same source is explicit: strictly speaking, a telephoto lens doesn’t change perspective, which depends only on where you stand. But to fill the frame with a distant subject, you have to be far from everything. From that distance, the difference between how far away the tree is and how far away the mountain is matters very little, so the two seem to sit right on top of each other.
The practical takeaway: you choose compression with your feet, not your zoom ring. If you want a mountain looming over a house, walk away from the house, then zoom in. Zooming from where you stand only changes how much of the scene fits in the frame.
When should you use a telephoto instead of a wide angle?
When your subject is far away and there’s nothing between you and it worth including. That’s exactly where wide angles fail most often: as we covered in wide-angle photography mistakes, a short lens shrinks everything in the distance, and the mountain turns into a thin strip above the horizon.
A quick way to decide in the field:
| What’s in front of you | Better choice | Why |
|---|---|---|
| Something interesting a few feet away, subject in the background | Wide angle | A big foreground adds depth and leads the eye |
| Distant subject, empty or messy foreground | Telephoto | Leave out what doesn’t help and fill the frame with the subject |
| Several ridges, hills or tree lines at different distances | Telephoto | Compression turns the layers into graphic bands |
| Light hitting only a small part of the scene | Telephoto | Isolate the lit area instead of losing it in a sea of shadow |
| A small element (tree, cabin, person) in front of a huge mountain | Telephoto, from far away | Show scale: the small stays small, the big looms |
| A spectacular sky across the whole horizon | Wide angle | You need breadth, not detail |
On our photo tours we often see the same thing happen: the light arrives, everyone shoots with their shortest lens, and then whoever puts on the telephoto finds three or four different compositions from the same spot. That’s no accident. With a narrow angle of view, Cambridge in Colour notes, you can be much more selective about what goes in the frame.
How do you show scale with a telephoto lens?
Put something of a known size in front of something huge, then step back from both. To get the full effect, Cambridge in Colour suggests getting as far as possible from the nearest subject and zooming in if needed: that way the near element isn’t blown up, and it keeps its true proportions against the background.
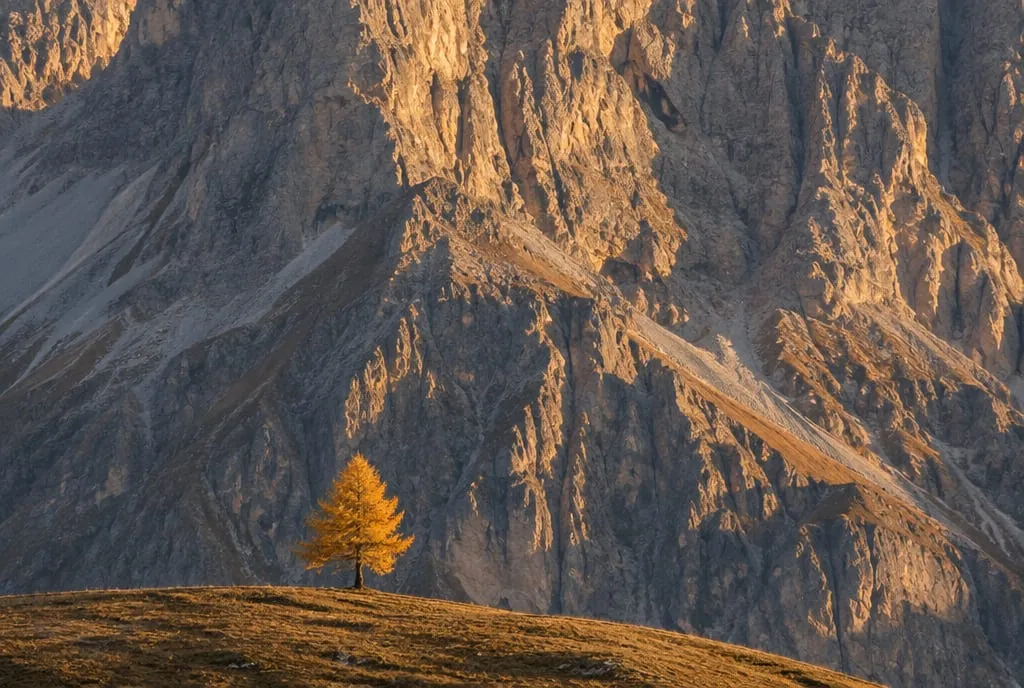 Shot from far away with a telephoto, the larch stays small and the rock face seems to rise right behind it: the contrast between the two is what tells you how big the mountain is. Image generated to illustrate the concept.
Photographer David Noton makes the same point in Canon’s article on telephoto landscapes: trying to get it all in never works, while isolating one tree against the immense backdrop of a mountain does. Look for something viewers can size up at a glance (a tree, a cabin, a person, a trail) and keep it small, with room around it.
Why do telephoto landscapes look flat?
Because compression removes the depth cues our eyes expect. Cambridge in Colour is blunt about it: normalizing relative size too much can make a scene look static, flat and uninteresting, since we expect nearer things to look a little bigger.
The fix, according to the same source, is to build the frame from layers at distinctly different distances: a first band of trees, then hills that get farther and farther away, then the sky or background. The air helps too. Each more distant layer is lighter and lower in contrast than the one in front of it, and that tonal gradient replaces the size difference the telephoto flattened.
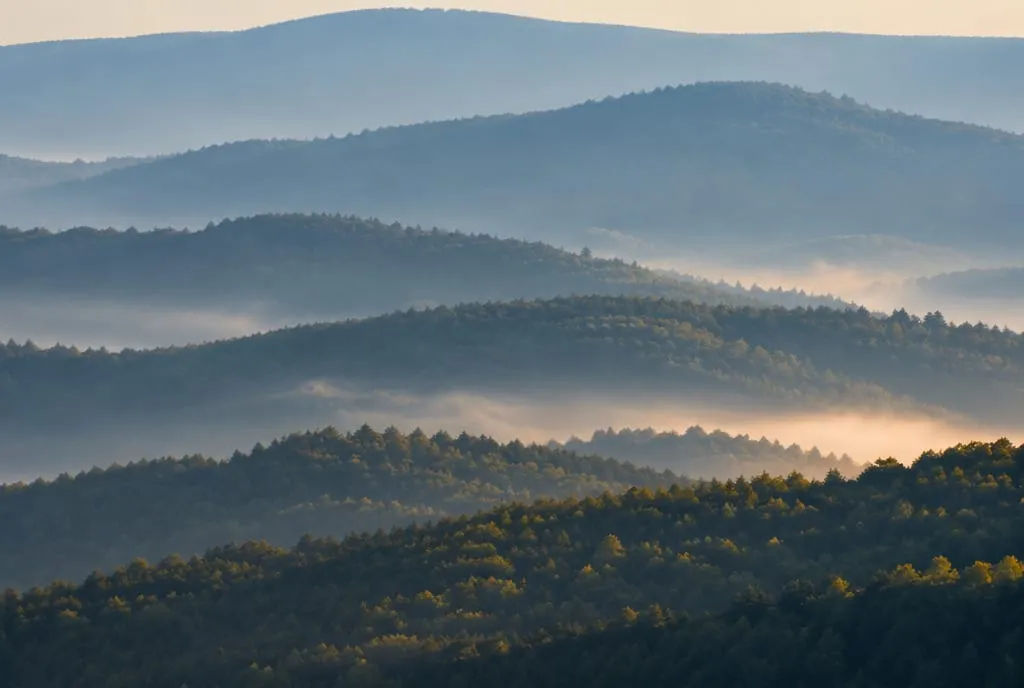 Ridges at different distances compressed by a telephoto: with no close foreground and only a sliver of sky, depth comes from the change in tone from one layer to the next. Image generated to illustrate the concept.
Three things to look for if you want to avoid a flat frame:
- Tonal separation between layers. Light haze, mist in the valleys, or low side light that lifts one ridge off the next. In flat midday light, the layers blend together. Fog, Cambridge in Colour notes, becomes even more prominent with a telephoto, since distant objects appear closer.
- Lines that lead in. A diagonal, a river, the edge of a forest: even in a compressed scene, the eye needs a path.
- Somewhere to look. A lone tree, a house, a patch of light. Without a subject, a stack of layers is just a texture.
How do you avoid blurry telephoto shots?
Use a faster shutter speed, a steadier support, or ideally both. Cambridge in Colour explains that longer focal lengths need shorter exposures to avoid blur, using the image of a laser pointer: the farther away the wall, the more the dot jumps around. A long lens magnifies the scene and, with it, every tiny movement you make.
The most common handheld rule of thumb is a shutter speed of at least one over the equivalent focal length: about 1/200s at 200mm on full frame, or 1/300s with the same lens on a 1.5x crop body. Treat it as a starting point, not a guarantee. Stabilization lets you go slower; fatigue and wind call for faster. To tell camera shake from motion blur, see our guide to blurry photos.
On a tripod, the enemy is wind. In Canon’s article, Noton observes that even the sturdiest tripod won’t hold a long lens perfectly still in a stiff wind; in those conditions he shoots handheld, raising the ISO if needed and leaning on image stabilization. The same article reports that another photographer, Radomir Jakubowski, turns stabilization off when working on a tripod with a remote release. Lenses don’t all behave the same way on a tripod, so check what your lens manual recommends.
A few more tripod habits that help:
- Remote release or self-timer, so your finger doesn’t shake the camera.
- Center column down, and extend the thicker leg sections first: the taller and thinner the support, the more it vibrates.
- Lens collar, if your lens has one: mounting the collar instead of the camera body balances the weight better.
- Several frames in a row when the wind is gusty: one of them often lands in a lull.
Why do telephoto landscapes look hazy or soft?
Because there’s a lot of air between you and your subject, and air is never perfectly clear. Two different things are going on, and you deal with them differently.
Atmospheric haze lowers contrast and shifts distant colors toward blue. Sometimes that’s an asset, as with stacked ridges; sometimes it’s a problem, when you want a crisp peak. You can win back some contrast in editing, but go easy: a distant summit with too much contrast stops looking distant.
Heat shimmer is sneakier. Warm air rising from the ground mixes with cooler air and bends the light, so the subject looks wavy and soft. Adorama notes that it gets worse with distance and on warm days, and that once it’s moderate or severe, no amount of sharpening will fix it. The same source suggests:
- Shooting at or just after sunrise, when the temperature difference between ground and air is smallest.
- Getting closer when you can: less air to look through means less distortion.
- Not shooting across hot surfaces such as roads, sand, sunlit rock or metal, and staying away from a car that’s just been running. Gaining height helps.
- Letting your gear acclimatize: if the lens comes out of a warm space, warm air trapped in the lens hood can create shimmer right in front of the glass.
A note on lens hoods: in the same Canon article, Vladimir Medvedev says he always uses one on a telephoto to cut glare and improve contrast, even shooting toward the sun. The two tips don’t conflict. Keep the hood on, but give it time to reach the outside air temperature.
How do you focus a telephoto landscape?
Choose your focus point carefully, because at the same subject distance a telephoto gives you less depth of field. Cambridge in Colour stresses, though, that a telephoto lens doesn’t inherently have less depth of field: if the subject fills the same share of the frame, it’s practically the same as with a wide angle. What the long lens does is magnify the background, and its blur with it.
In landscapes this often works in your favor, because every layer is far away. A worked example: at 200mm and f/11 on full frame, with the standard 0.03mm circle of confusion, the hyperfocal distance is about 120 meters (roughly 400 feet). Focus there and everything from about 60 meters (200 feet) to infinity is acceptably sharp. If the nearest layer in your scene is beyond that point, you don’t have to choose. If you include something a few meters away, the telephoto can’t hold it all, and you either decide what to let go soft or turn to focus stacking. Numbers for other focal lengths are in our hyperfocal distance guide.
What to do next
The four-fragments exercise, to train a selective eye: one hour, a telephoto (or your zoom at its longest setting), and a viewpoint with at least two or three layers at different distances.
- Reference shot. Photograph the whole scene at your shortest focal length. This is the “everything” you’ll subtract from.
- Light fragment. Find the brightest or most contrasty area and zoom in until it fills the frame. Shoot.
- Layers fragment. Find at least three overlapping layers, such as hills, tree lines or ridges, and frame only those, with no sky or just a thin strip. Shoot.
- Scale fragment. Spot a small element in front of a big one. If you can, move farther from the small element and zoom in again. Shoot before and after the move and compare how much the background looms.
- Detail fragment. A texture, a repeating pattern, the shape of a single rock or tree. Shoot.
- Sharpness check. View the four fragments at 100%. If they’re soft, check shutter speed, wind and heat shimmer before blaming the lens.
Then put the four fragments next to the reference shot: which one has the most photograph in it? If you’d like an outside opinion, upload your best fragment and the reference shot to Framia. Each gets a score and an explanation across six categories, including Optics and Composition, so you can see whether subtracting made the photo stronger.
FAQ
What focal length do I need for telephoto landscapes?
There's no single right answer. Cambridge in Colour calls lenses longer than about 70mm on full frame medium telephoto, and full telephoto starts around 135mm. A 70-200mm or 70-300mm zoom covers most landscape situations; longer lenses are for isolating very distant details, such as a single ridge or the moon above a peak.
Can I get telephoto compression by cropping a wide-angle shot?
In terms of perspective, yes: from the same spot, a telephoto shot and a crop of the same area from a wide-angle frame show the same relationship between layers, because perspective depends only on where you stand. What changes is resolution. The crop uses a small fraction of the pixels, so it holds up far worse when enlarged.
Do telephoto lenses have less depth of field than wide angles?
Only at the same subject distance. Cambridge in Colour points out that if the subject fills the same share of the frame, depth of field is practically the same; a telephoto does magnify the background, and its blur along with it. In landscapes, where every layer is far away, a middle aperture often keeps the whole scene sharp.
Should I use a polarizer on a telephoto lens?
The uneven, patchy sky you can get with an ultra-wide is much less of an issue with a narrow angle of view. A polarizer is still useful for cutting glare on water and wet leaves. Photographers disagree on how much it helps against distant haze, so rotate the filter while looking through the viewfinder and check whether the haze actually changes in your scene.