How to Get a Blurry Background (Even With a Kit Lens)
 by Marco Carotenuto · · 10 min read

You set the aperture to f/5.6, photographed your kid in front of the backyard hedge, and the hedge is almost as sharp as they are. The first instinct is to blame the lens. Usually the lens is not the problem: a blurry background depends on four levers, and aperture is only one of them.
This guide shows what the levers are, how much each one actually does (with a chart of calculated numbers, including the 18-55mm kit lens), how to make the blur look better and not just stronger, and what to do on a phone. At the end there is a 30-minute exercise.
How do you blur the background in a photo?
You blur it by putting the background far outside the depth of field, the zone in front of and behind the focus point that looks sharp. The farther the background sits from that zone and the larger the lens opening, the more each point in the background spreads into a small disc, and overlapping discs become a smooth wash.
There are four levers:
- Wide aperture. A low f-number: f/1.8, f/2.8, or the lowest your lens offers.
- Subject-to-background distance. The farther the background is behind your subject, the more it blurs. This is the most underrated lever.
- Camera-to-subject distance. The closer you get, meaning the more the subject fills the frame, the more the background blurs.
- Longer focal length. For the same framing, a zoom at its long end blurs more, even though its maximum aperture is smaller there.
Most guides list these levers. Few show how much each one is worth, and that is what decides where you spend your effort.
How much does each lever matter? The numbers
What matters most is a quantity almost nobody mentions: the physical diameter of the aperture, which is the focal length divided by the f-number. A 55mm lens at f/5.6 has an opening of about 10 mm; an 18mm lens at f/3.5 has about 5 mm. The f-number is lower at 18mm, but the hole the light passes through is half the size.
The background blur formula (it is in the depth of field article on Wikipedia) can be rearranged into something practical: the size of a blur disc, relative to the width of the photo, is roughly the aperture diameter divided by the width of the scene at the subject’s distance, multiplied by a fraction that grows as the background gets farther behind the subject.
We used it to calculate some typical cases. Assumptions: thin-lens model, a waist-up portrait (about 1 m, or 3.3 ft, of scene across at the subject), background 3 m (10 ft) behind the subject unless stated otherwise, APS-C sensor 23.5 mm wide or full frame 36 mm wide. Real lenses shift the exact numbers; the ratios are what count.
| Setup | Physical aperture | Blur disc (% of frame width) | On a 6,000 px wide photo |
|---|---|---|---|
| Phone, main camera (about 6 mm actual focal length, f/1.8) | 3.3 mm | 0.28% | about 17 px |
| APS-C, kit lens at 18mm f/3.5 | 5.1 mm | 0.41% | about 24 px |
| APS-C, kit lens at 55mm f/5.6 | 9.8 mm | 0.55% | about 33 px |
| APS-C, kit at 55mm f/5.6, background 1 m (3 ft) behind | 9.8 mm | 0.29% | about 17 px |
| APS-C, kit at 55mm f/5.6, background 20 m (65 ft) behind | 9.8 mm | 0.88% | about 53 px |
| APS-C, kit at 55mm f/5.6, tight head-and-shoulders (50 cm of scene) | 9.8 mm | 1.39% | about 84 px |
| APS-C, kit at 55mm f/5.6, head-and-shoulders, background 20 m behind | 9.8 mm | 1.85% | about 111 px |
| APS-C, 50mm f/1.8 | 27.8 mm | 1.61% | about 97 px |
| Full frame, 85mm f/1.8 | 47.2 mm | 2.60% | about 156 px |
How to read it:
- Focal length beats a lower f-number. At the same framing, the kit lens at 55mm f/5.6 blurs about a third more than at 18mm f/3.5.
- A distant background is worth a lot. With the same lens, moving from a background 3 ft behind to one 65 ft behind triples the blur.
- Tighter framing is worth even more. Going from waist-up to head-and-shoulders multiplies the blur by about two and a half.
- Combined, the levers beat a fast lens used badly. The kit lens at 55mm, framed tight with a distant background, blurs more than a 50mm f/1.8 at waist-up with the background 10 ft away.
The 50mm f/1.8 is still the most effective upgrade if you want more: with everything else equal, it blurs about three times as much as the kit lens at 55mm. But the chart says it is worth using what you have properly first. Why longer lenses seem to blur more is also covered in focal length and perspective.
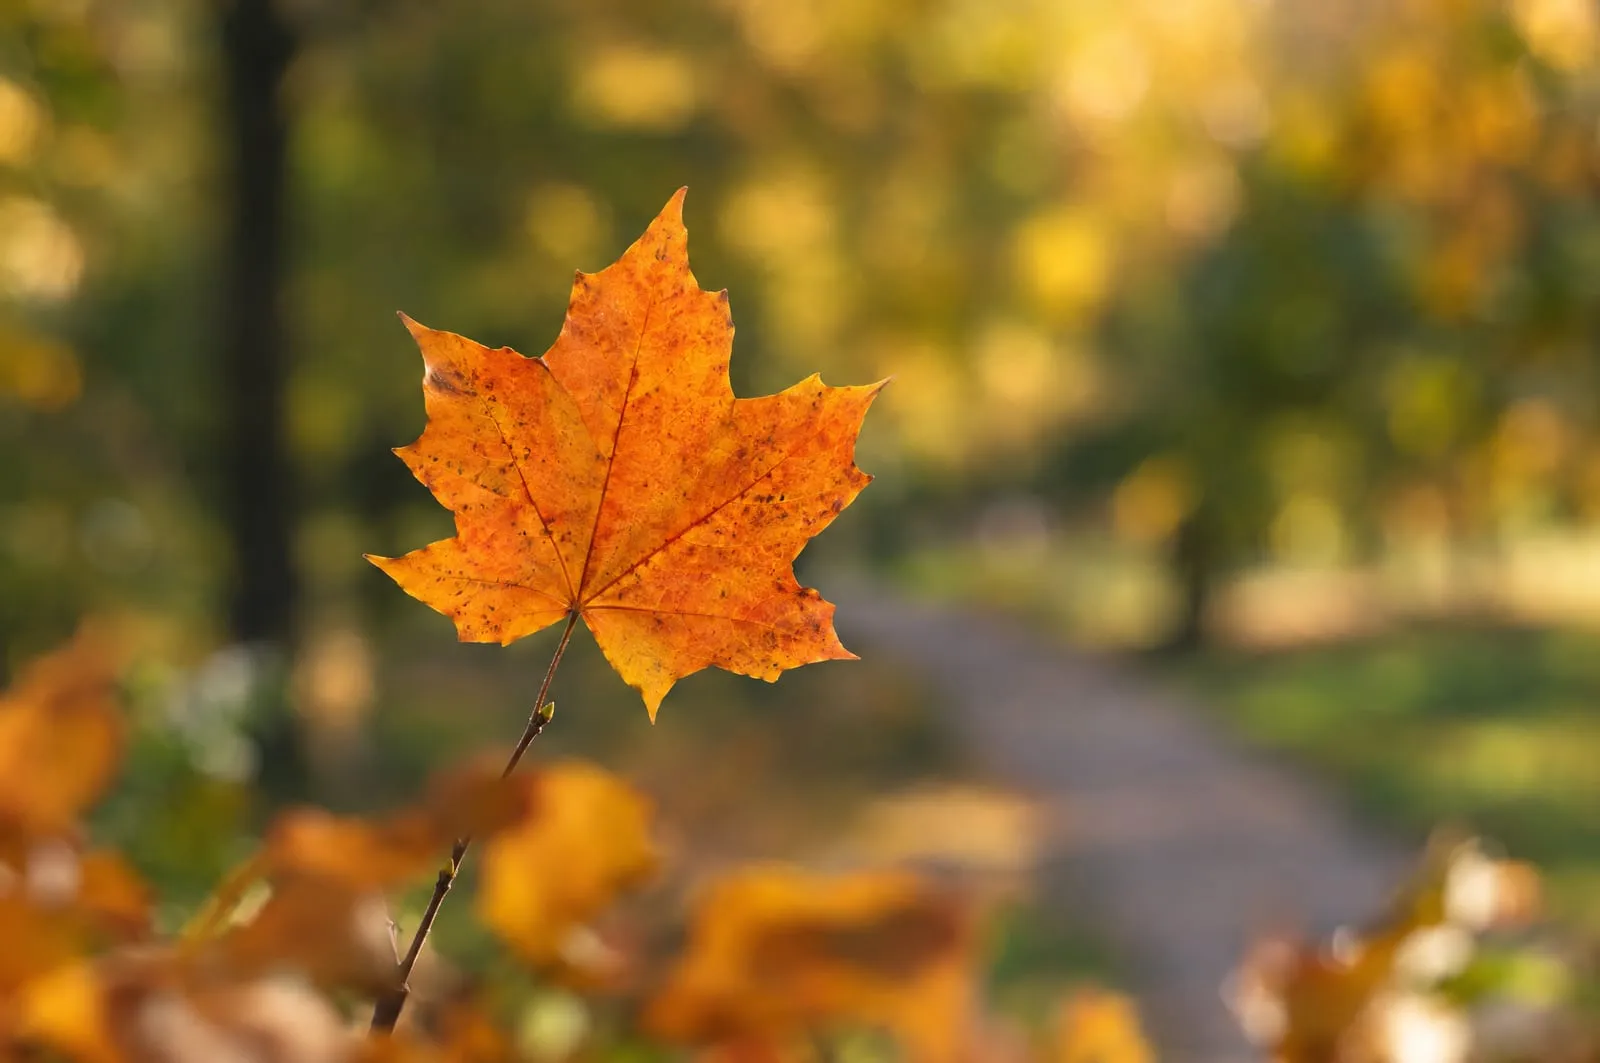 The subject is small and close, the background is dozens of yards away: even without a fast lens, the trees turn into a wash of color. The blurred leaves in front add depth. Image generated to illustrate the concept.
How do you get a blurry background with an 18-55mm kit lens?
Zoom to 55mm, open the aperture as far as it goes (usually f/5.6 at that focal length), get close enough to frame the subject tightly, and pick a distant background. It is one of the most common questions on beginner forums, and the answer is not “buy another lens.”
In the field:
- Choose the background first, then where you stand. Look for a direction with at least 30 to 60 feet of open space behind the subject: an open field, a long street, a valley. A wall or a hedge 3 feet behind will barely blur with any lens.
- Pull the subject away from the background. If the person is leaning on the wall, have them step forward a few yards. It costs nothing and, as the chart shows, it is one of the strongest levers.
- Use the long end and step back. At 55mm you stand farther away for the same framing, and the physical aperture is almost twice as large as at 18mm.
- Frame tighter. A chest-up portrait blurs far more than a full-length shot. If you want full length with a blurred background, you need a really distant background.
- Use Aperture Priority. In A or Av you set the lowest f-number and the camera picks the shutter speed. In Auto you may end up at f/8.
On photography tours we often see the reverse mistake: someone with a fast lens places their travel companion one step from a rock face and then wonders why the background is still readable. Background distance matters for everyone, not just kit lens owners.
Why does a blurred background sometimes still look bad?
Because the amount of blur says nothing about its quality. That is what bokeh means: Wikipedia defines it as the aesthetic quality of the blur in out-of-focus areas, in front of or behind the subject. A very blurred background full of random bright and dark patches can distract as much as a sharp one.
Three things decide whether the blur helps your subject:
- What is in the background, even when blurred. A white patch stays a white patch: blown-out sky between branches or a red car turn into spots of light or color that pull the eye. Move a few feet to leave them out. Blur does not choose a good background for you; you still have to pick one that looks good when it is soft.
- The shape of the highlights. Small distant lights become discs. Wide open they are usually round; stopped down they take the polygonal shape of the aperture blades. Lenses with more blades, or rounded blades, keep the discs closer to a circle.
- The lens’s character. Some lenses render discs evenly and softly, others with a brighter rim, which gives busier blur, especially with backlit branches and leaves. Settings will not change it: notice it and choose simpler backgrounds.
 Small distant lights against a dark background: each point becomes a disc shaped like the aperture. This is where bokeh shows the most. Image generated to illustrate the concept.
Wide open: what can go wrong?
Two things: your subject is no longer entirely sharp, and the photo can come out overexposed. Both are typical when people jump from f/5.6 to f/1.8.
Depth of field gets razor thin. With a 50mm at f/1.8 and the subject 2 m (6.6 ft) away, the sharp zone on full frame is about 17 cm, or 7 inches (we calculated it in the depth of field guide). In a tight portrait, a slight head turn is enough to leave one eye sharp and the other soft. Focus on the nearest eye with a single AF point or eye detection if your camera has it; the guide to autofocus modes explains how to choose. For two people at different distances, stop down a little or line them up at the same distance from you.
Too much light. In full sun at f/1.8 and ISO 100, the shutter speed needed can be faster than your mechanical shutter allows. Fixes: lowest ISO, the electronic shutter if your camera has one, or an ND filter to cut light. How to balance the three settings is in the exposure triangle.
| Problem | Likely cause | Fix |
|---|---|---|
| Background still sharp | Background too close to the subject | Move the subject away from it or change direction |
| Only a little blur | Short focal length, wide framing | Zoom to the long end, step back, frame tighter |
| Nose sharp, eyes soft | Depth of field too thin, wrong focus point | Focus on the nearest eye, stop down one stop |
| Bright spots pulling the eye | Sky or strong lights showing through the background | Change your position, look for an even background |
| Overexposed wide open | Too much light for the fastest shutter speed | Lowest ISO, electronic shutter or ND filter |
How do you blur the background on a phone?
Use Portrait mode, because optically a phone blurs very little. In the chart, a phone’s main camera has a physical aperture of about 3 mm, against 10 mm for the kit lens at 55mm: at the same framing the background stays nearly sharp. The tiny lens and sensor simply cannot produce the shallow depth of field that optical blur needs, so phones simulate it.
Portrait mode builds a depth map of the scene, using two cameras or machine learning, and blurs whatever it estimates to be far away. It works well on subjects with clean outlines. The weak spots are complex edges: hair, glasses, branches, the gap between an arm and the body. Two habits help: even with a phone, move the subject away from the background, because it makes depth easier to estimate; and always zoom in on the edges before you post.
The same idea applies in editing. Lens Blur in Lightroom builds a depth map and blurs the background or foreground. It is useful for rescuing a shot, but it starts from what you photographed: blurring distracting objects does not remove them.
What to do next
The four-lever exercise: 30 minutes, a person or a tall object (a bottle, a vase) and a spot with at least 60 feet of open space in one direction.
- Baseline shot. Put the subject 3 feet from a wall or hedge. Aperture Priority, shortest focal length, widest aperture, waist-up framing. This is your reference.
- Lever 1, focal length. Without moving the subject, zoom to the long end and back up until the framing matches. Shoot.
- Lever 2, background distance. Turn the scene around so the open space is behind the subject. Same focal length, same framing. Shoot.
- Lever 3, framing. Move closer until you frame only head and shoulders (or the top half of the object). Shoot.
- Lever 4, aperture. Repeat the last shot at f/8 to see how much the wide aperture gave you.
- Compare. Put the five shots side by side and rank the levers from the one that changed the most to the one that changed the least with your gear.
If you want an outside opinion, upload the best shot to Framia: the Optics category gives you a score from 0 to 100 and a concrete explanation of how you are using blur and depth of field.
FAQ
What is the difference between bokeh and a blurry background?
A blurry background is about how much blur you get; bokeh is about its quality, meaning how the lens renders out-of-focus areas. Two lenses can blur the same background by the same amount and still look different: round or polygonal highlights, smooth or busy transitions.
Why does my background stay sharp in Auto mode?
Because in Auto the camera often picks a middle aperture such as f/5.6 or f/8 to keep things sharp. Switch to Aperture Priority (A or Av) and set the lowest f-number your lens allows.
Does full frame blur more than APS-C?
For the same framing and f-number, yes: to frame the same subject, full frame uses a longer focal length, so the physical aperture is larger. An f/1.8 lens on APS-C blurs roughly like f/2.8 on full frame.
Can I blur the background in editing?
Yes, with tools such as Lens Blur in Lightroom, which estimates a depth map and blurs what it judges to be far away. Results are often convincing, but zoom in on tricky edges like hair and branches, because that is where the depth estimate most often goes wrong.
What aperture do I need for a blurry background?
No single number does it alone: f/1.8 with the background a foot and a half behind the subject can blur less than f/5.6 with the background 60 feet away. Use the widest aperture that keeps your whole subject sharp, then work on distances and framing.